
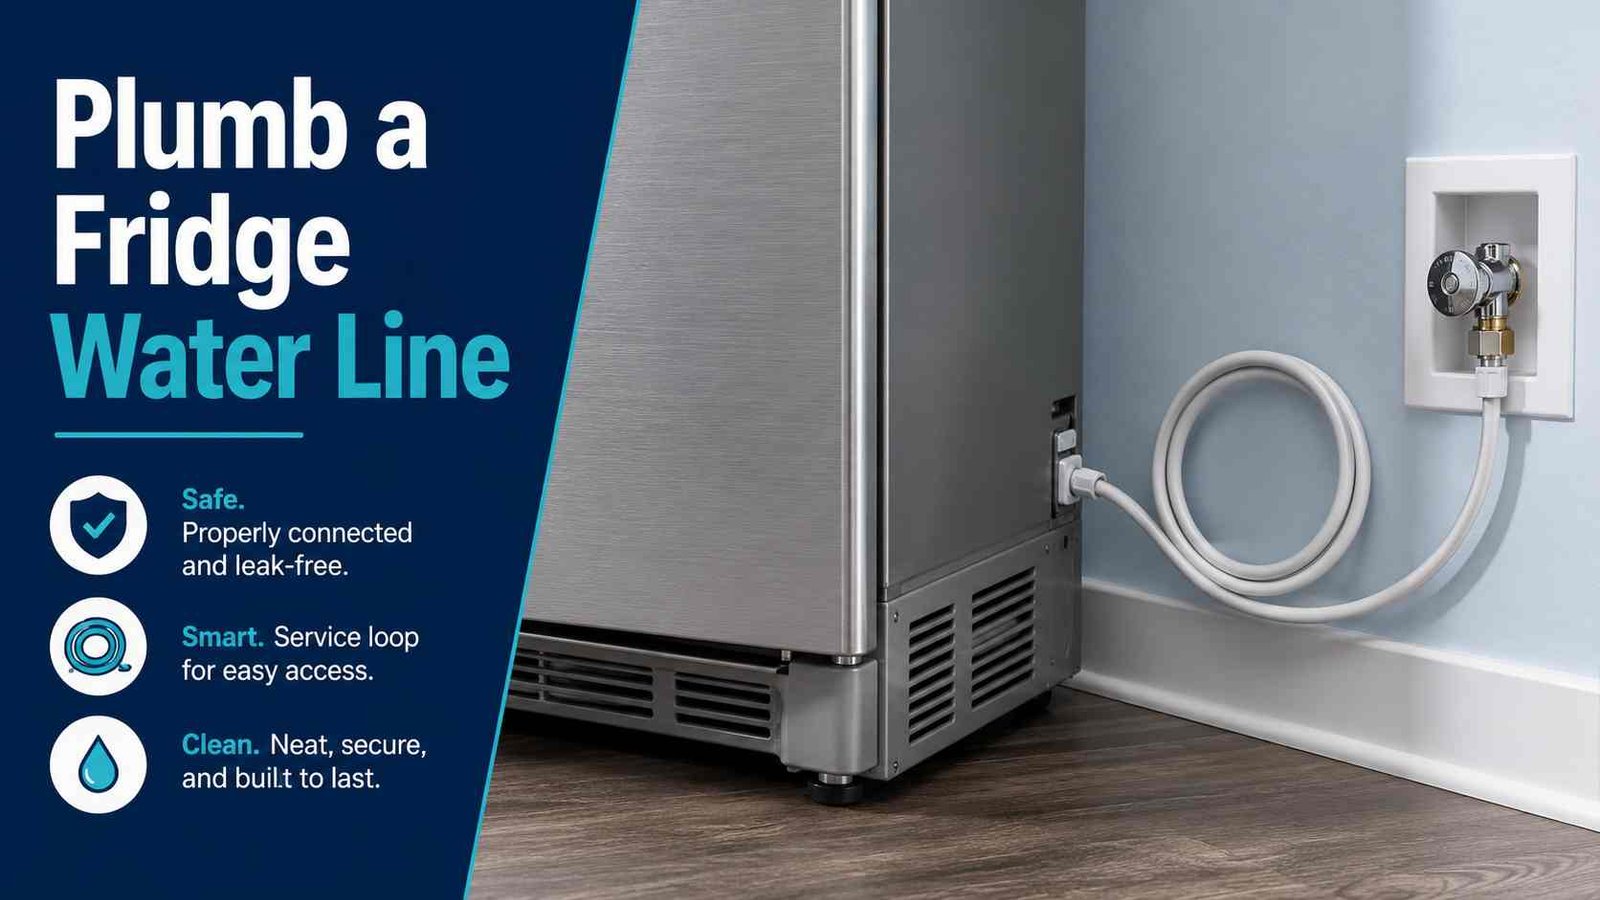
 To plumb a refrigerator water line, you need a cold potable-water supply, an accessible shutoff valve, approved supply tubing, and the correct fitting for your refrigerator. In North America, 1/4-inch tubing is common, but tubing size, fittings, water-pressure requirements, and flushing instructions can vary by brand and model. Whirlpool, for example, specifies 1/4-inch outside-diameter copper or PEX in current support guidance, while Samsung US recommends a 1/4-inch copper installation kit for many models.
If an appropriate refrigerator shutoff valve already exists, connecting the appliance can be a manageable homeowner job. If you need to cut into household plumbing, run pipe through walls or floors, replace a leaking valve, or comply with a manufacturer requirement for professional installation, use a qualified plumber instead. Whirlpool specifically recommends professional help for more complicated installations.
Safety note: Always check the installation manual for your exact refrigerator before starting. Model-specific instructions take priority over any general guide.
The Refrigerator Water-Line Guide
| Item | General guidance |
|---|---|
| Water source | Cold potable/drinking water |
| Common North American tubing | 1/4-inch copper or model-approved PEX/plastic |
| Shutoff | Accessible, code-compliant water shutoff |
| Extra tubing | Leave enough for the refrigerator to pull forward |
| Before connection | Flush the new supply line |
| After connection | Slowly restore water and inspect every fitting |
| Before drinking | Flush according to the refrigerator manual |
| Call a plumber | New household plumbing, leaking valves, code questions, or manufacturer requirement |
Whirlpool recommends leaving a coil or service loop so the refrigerator can be pulled forward without disconnecting the supply. It also warns that a pinched or kinked line can reduce water flow.
First Check Whether Your Refrigerator Actually Needs Plumbing
Not every refrigerator with a water dispenser or ice feature connects directly to household plumbing.
Plumbed refrigerator
A plumbed refrigerator receives water continuously from the home’s cold-water supply. This is typical of many French-door, side-by-side, and premium refrigerators with automatic ice makers and door dispensers.
Non-plumbed refrigerator
Some refrigerators use a refillable internal water tank instead. LG UK currently describes both plumbed and non-plumbed refrigerator designs, while Samsung Australia also sells and supports models using internal refillable tanks.
If your refrigerator has a removable water tank, household plumbing may not be necessary at all.
What You Need to Plumb a Refrigerator Water Line
For a typical installation with an existing suitable shutoff valve, you may need:
- Manufacturer-approved refrigerator water tubing
- Correct refrigerator connector or compression fitting
- Adjustable wrench
- Tubing cutter if required by the approved connection system
- Bucket or container for flushing
- Towels for checking small leaks
- Refrigerator installation manual
For many Whirlpool refrigerators, the household connection uses 1/4-inch outside-diameter soft copper or PEX. Samsung US recommends a 1/4-inch copper kit for many of its refrigerators, but it also notes that the exact procedure varies with the equipment and model.
Do not buy fittings based only on the phrase refrigerator water line. Check what your refrigerator’s installation manual requires at the appliance inlet.
Copper or PEX for a Refrigerator Water Line?
Both materials appear in manufacturer guidance, but there is no universal answer for every refrigerator.
Copper tubing
Copper has long been used for refrigerator supplies. Samsung US currently recommends a 1/4-inch copper installation kit for many refrigerators.
PEX tubing
Whirlpool’s current support guidance permits 1/4-inch O.D. soft copper or PEX for the connection between the shutoff valve and refrigerator on the products covered by that guidance.
Plastic tubing
Some refrigerators use manufacturer-specific plastic tubing or push-fit connections. Samsung notes that where plastic tubing is used in the connection it describes, the correct molded end is important and its generic plastic tubing kit is not its preferred option.
Bottom line: use the tubing type and connection system approved for the exact refrigerator. Do not force a generic compression fitting onto tubing designed for a different connector.
How to Plumb a Refrigerator Water Line Step by Step
The steps below assume that a suitable, code-compliant cold-water shutoff already exists. Installing new permanent household plumbing may require a plumber.
1. Read the Refrigerator Installation Manual
Before buying tubing, confirm:
- Connection type
- Required tubing size
- Minimum and maximum water pressure
- Whether an external filter is required
- Whether a pressure-reducing valve is required
- Required flushing procedure
- Whether installation must be performed by a qualified professional
This matters because even refrigerators from the same manufacturer can have different requirements.
2. Pull the Refrigerator Forward Safely
Give yourself enough room to reach the water inlet without crushing the power cord or supply tubing.
Unplug the refrigerator when the manufacturer’s installation procedure calls for it. Whirlpool’s installation guidance begins with disconnecting power before working behind the appliance, and Fisher & Paykel also warns against trapping or damaging the power cord during installation.
Do not open electrical covers or work on internal wiring.
3. Locate the Cold-Water Supply
The refrigerator should connect to cold drinking water, not a hot-water pipe.
Samsung specifically instructs users to connect the filtration hose to cold potable water, and Whirlpool likewise states that the refrigerator should be connected to a cold-water supply for its ice maker and dispenser.
A suitable connection may already be located behind the refrigerator or inside a nearby cabinet.
4. Shut Off the Water
Close the existing shutoff supplying the refrigerator connection.
If the installation involves modifying a household water pipe rather than simply using an existing appliance valve, this is where many homeowners should switch to a qualified plumber.
A permanent plumbing mistake can remain hidden behind cabinets or flooring and cause significant water damage.
5. Route the Tubing to the Refrigerator
Run the approved tubing from the shutoff toward the appliance.
Avoid:
- Tight bends
- Sharp cabinet edges
- Hot surfaces
- Locations where the line can freeze
- Areas where drawers or stored items can crush it
- Pulling the tubing tight between the valve and refrigerator
Whirlpool specifically identifies kinks as a cause of restricted water flow.
6. Leave a Service Loop Behind the Refrigerator
Do not cut the tubing so precisely that the refrigerator can no longer be moved.
Leave a gentle coil or service loop behind the appliance. It should provide enough slack to pull the refrigerator forward for cleaning or service without stressing either fitting.
Whirlpool explicitly recommends this approach. Fisher & Paykel also instructs installers on relevant models to run enough tubing to the rear of the refrigerator so it can be pulled out for service.
The loop should remain broad and smooth rather than tightly coiled or folded.
7. Flush the New Supply Tubing
Before making the final refrigerator connection, flush the new supply line when the manufacturer’s procedure calls for it.
Whirlpool directs installers to place the free end into a bucket or sink and run water until it is clear before connecting the line to the refrigerator.
Do not assume there is one universal flushing quantity. Manufacturer instructions differ substantially. Samsung US tells users of applicable models to dispense one gallon before drinking, Samsung Australia specifies about 10 litres or 6–7 minutes in one current procedure, and a Fisher & Paykel installation guide specifies 8 litres through the filter during part of its installation process.
Follow your own refrigerator manual.
8. Connect the Supply Line to the Refrigerator
Connect the tubing to the refrigerator inlet using the manufacturer-approved fitting.
With a compression connection, the tubing must enter squarely and the fitting should be secure without excessive tightening. Samsung warns that overtightening its compression connection can cause a leak.
Other refrigerators may use push-fit connectors, locking clips, filter tubing or model-specific adapters instead of a conventional compression connection.
Do not substitute a generic fitting if the manual shows a different system.
9. Slowly Turn the Water Back On
Restore the water supply while watching the connection.
Check both ends:
- Household shutoff connection
- Refrigerator inlet connection
Also inspect any inline filter or intermediate coupling.
A connection that initially looks dry can develop a slow bead of water after several minutes, so check again before pushing the appliance fully into place. Both Whirlpool and Samsung instruct users to check the completed connection for leaks.
10. Position the Refrigerator Without Pinching the Line
Move the refrigerator back gradually while watching the supply tubing.
The service loop should fold naturally into the available space. It must not become trapped beneath the refrigerator, sharply kinked against the wall, or crushed behind the cabinet.
Whirlpool notes that pushing the refrigerator too far against the wall can pinch the water line and reduce flow.
11. Flush the Refrigerator’s Internal Water System
Once the appliance is connected, follow its first-use flushing procedure.
This step helps clear air and material left in the new tubing or filtration system.
The required amount varies enough by manufacturer that using an arbitrary number from another refrigerator is a poor idea. Follow your model manual rather than assuming that one gallon, two gallons, ten litres or a certain number of ice batches applies universally.
How to Run a Refrigerator Water Line From Under the Sink
A nearby kitchen sink is a common source when the refrigerator does not have a dedicated outlet directly behind it. Whirlpool includes a below-sink water supply as one possible connection arrangement in its installation overview.
The safest arrangement is usually:
Cold-water plumbing → code-compliant branch and shutoff → refrigerator tubing → refrigerator inlet
If the sink plumbing already has a properly installed refrigerator outlet and shutoff, you may only need to route and connect the appliance tubing.
If you need to alter the fixed plumbing, install a new tee, drill pipe, solder copper, or replace a valve, consider having a plumber make the household connection. This also gives you an opportunity to locate the shutoff somewhere accessible rather than burying it behind the appliance.
Should a Refrigerator Have Its Own Shutoff Valve?
An accessible shutoff is important because it allows the refrigerator supply to be isolated without shutting off water to the entire home.
Avoid assuming that a self-piercing saddle valve is the right solution simply because refrigerator installation kits historically included them.
GE currently says self-tapping or self-piercing valves are not recommended because the opening may be too small and restrict water flow. Whirlpool similarly advises against piercing-type or undersized saddle valves in its current troubleshooting guidance and tells users to check local plumbing codes.
A restricted supply can contribute to slow dispensing, small or hollow ice cubes, or reduced ice production.
Use a shutoff arrangement allowed by your local plumbing requirements and refrigerator documentation.
What Water Pressure Does a Refrigerator Need?
There is no single pressure range that should be applied to every refrigerator.
As examples, Whirlpool’s current general support guidance lists 30–120 psi (207–827 kPa) for the refrigerators covered by that page, while Samsung US states that at least 30 psi is required for proper ice-maker operation in the installation guidance it publishes for applicable models.
Other model-specific documents can differ, so always check your installation manual.
Low pressure may cause:
- Slow water dispensing
- Small ice cubes
- Hollow ice
- Slow ice production
Before assuming the house pressure is too low, first check that the shutoff is fully open, the tubing is not kinked, and the filter is not clogged. Whirlpool lists these among its current water-flow checks.
Refrigerator Water Line Problems After Installation
| Problem | What to check first |
|---|---|
| Water leaking at fitting | Shut off supply and inspect connection |
| No dispenser water | Confirm valve is open and line is not kinked |
| Weak water flow | Check valve, tubing, filter and model pressure requirement |
| Ice maker not filling | Verify water supply and refrigerator setup |
| Small or hollow ice | Check for restricted flow or low pressure |
| Line kinks when fridge moves | Increase or reposition service loop |
| Air sputters from dispenser | Complete manufacturer’s flushing procedure |
Water Leaks at the Connection
Turn off the water immediately if you see an active leak.
Check accessible fittings for correct insertion and alignment. Do not keep tightening a compression fitting indefinitely; excessive tightening can itself cause problems on some connection systems. Samsung specifically warns against overtightening the connection described in its installation procedure.
Persistent leaks need correction before the refrigerator is returned to normal use.
No Water After Hookup
Check that:
- The shutoff valve is open
- Tubing is not kinked
- Tubing is not crushed behind the refrigerator
- The refrigerator filter is installed correctly where required
- The dispenser or ice maker is enabled according to the manual
Samsung Australia identifies incorrect connections, closed valves, obstructions, kinks and crushed tubing as causes to check when water does not dispense.
Water Flow Is Too Slow
A partially closed valve, restricted supply connection, kink, clogged filter or inadequate supply pressure can reduce flow. Whirlpool’s current guidance identifies all of these areas as relevant checks.
A self-piercing valve is also worth investigating because GE specifically associates this valve type with restricted refrigerator water flow.
Regional and Model Differences
Water-line installation is one of those appliance jobs where instructions can change significantly by market.
United States and Canada
A 1/4-inch supply connection is common in North American manufacturer documentation. Whirlpool permits 1/4-inch copper or PEX in its current general guidance, while Samsung US recommends a 1/4-inch copper kit for many models.
That does not mean every North American refrigerator uses the same connector.
United Kingdom and Ireland
Plumbed and non-plumbed refrigerators are both widely offered. LG UK’s current installation guidance tells owners of plumbed models to use the correct connector for the particular valve and to check for leaks and steady water flow. It directs non-plumbed owners to fill the internal dispenser tank instead.
Some Fisher & Paykel installation documentation covering UK and Ireland goes further and requires the water connection to be installed by a qualified plumber or Fisher & Paykel trained technician.
Australia and New Zealand
Check professional-installation requirements carefully.
Samsung Australia’s current side-by-side refrigerator guidance says that the water line must be connected by a qualified technician for the refrigerators covered by that procedure. It also calls for cold potable water and warns against bent, pinched or squashed tubing.
Fisher & Paykel likewise states in installation documentation covering Australia and New Zealand that the water connection on applicable Ice & Water refrigerators must be installed by a qualified plumber or its trained service technician and comply with local plumbing rules.
The important point is simple: your refrigerator manual and local plumbing requirements override generic DIY instructions.
When Should You Call a Plumber?
Use professional help when:
- There is no existing suitable refrigerator shutoff
- Fixed household plumbing must be altered
- The supply runs through walls, ceilings or floors
- The existing valve leaks or will not close
- You are unsure whether a valve or fitting complies with local plumbing rules
- Household water pressure needs diagnosis
- A concealed leak is suspected
- The manufacturer specifically requires qualified installation
- You cannot stop a leak after correctly reconnecting the approved fitting
Whirlpool notes that long or complicated supply routes through floors and walls are situations where professional assistance is advisable. Samsung Australia and Fisher & Paykel explicitly require professional installation for certain products and markets.
Refrigerator Water-Line Safety Checklist
Before considering the installation finished:
- Connect only to the specified cold potable-water source.
- Confirm all fittings match the model’s installation instructions.
- Keep the refrigerator disconnected from power while working behind it when directed by the manufacturer.
- Never work on internal electrical components.
- Leave enough tubing to pull the refrigerator forward.
- Keep tubing free from kinks, pinching and sharp bends.
- Inspect every accessible connection for leaks.
- Check again after the refrigerator has been pushed back.
- Complete the manufacturer’s flushing procedure.
- Know where the refrigerator water shutoff is located.
A slow leak behind a refrigerator can damage cabinets, flooring and walls long before it becomes obvious, so leak checking is one of the most important parts of the installation.
Frequently Asked Questions
What size water line is normally used for a refrigerator?
1/4-inch tubing is common in North America. Whirlpool currently specifies 1/4-inch O.D. copper or PEX in its general refrigerator guidance, and Samsung US recommends 1/4-inch copper tubing for many models. Always verify your own refrigerator because fittings can vary.
Can I connect a refrigerator water line under the kitchen sink?
Yes, an under-sink cold-water connection is a common arrangement, and Whirlpool includes it in its general installation guidance. If a suitable appliance shutoff does not already exist, installation of the new plumbing connection may be better handled by a plumber.
Can I connect the refrigerator to a hot-water line?
No. Connect it to the cold potable-water supply specified by the manufacturer. Samsung warns that connecting its filtration system to hot water can cause problems, while Whirlpool also specifies a cold-water supply.
How much extra water line should I leave behind the refrigerator?
Leave enough for the refrigerator to pull forward for cleaning or service without pulling on either fitting. Whirlpool describes this as a service loop rather than specifying one universal length.
Should I use a self-piercing saddle valve?
It should not be treated as the default choice. GE says self-piercing valves can restrict flow, and Whirlpool similarly advises against piercing-type saddle valves in its current support guidance. Local plumbing codes also need to be considered.
Why is my refrigerator water dispenser slow after installation?
First check that the shutoff is fully open, the supply tubing is not kinked or crushed, and the refrigerator filter is not restricted. Water pressure should then be compared with the specification for your exact refrigerator.
How much water should I flush after installing the line?
Follow the refrigerator manual because manufacturers specify different amounts. Current Samsung, Fisher & Paykel and other manufacturer instructions demonstrate that flushing quantities and procedures vary by model.
Do I need a plumber to install a refrigerator water line?
Not always. Connecting an appliance to an existing suitable shutoff may be within the ability of an experienced homeowner where local rules and the manufacturer permit it. Creating new household plumbing is a different job. Some manufacturers and markets explicitly require qualified installation, including applicable Samsung Australia and Fisher & Paykel models.

Daniel Brooks is a US-based appliance troubleshooting researcher with 12 years of experience studying washer, dryer, refrigerator, and dishwasher faults. He reviews manufacturer manuals and converts technical error codes into safe, practical guidance for homeowners.