
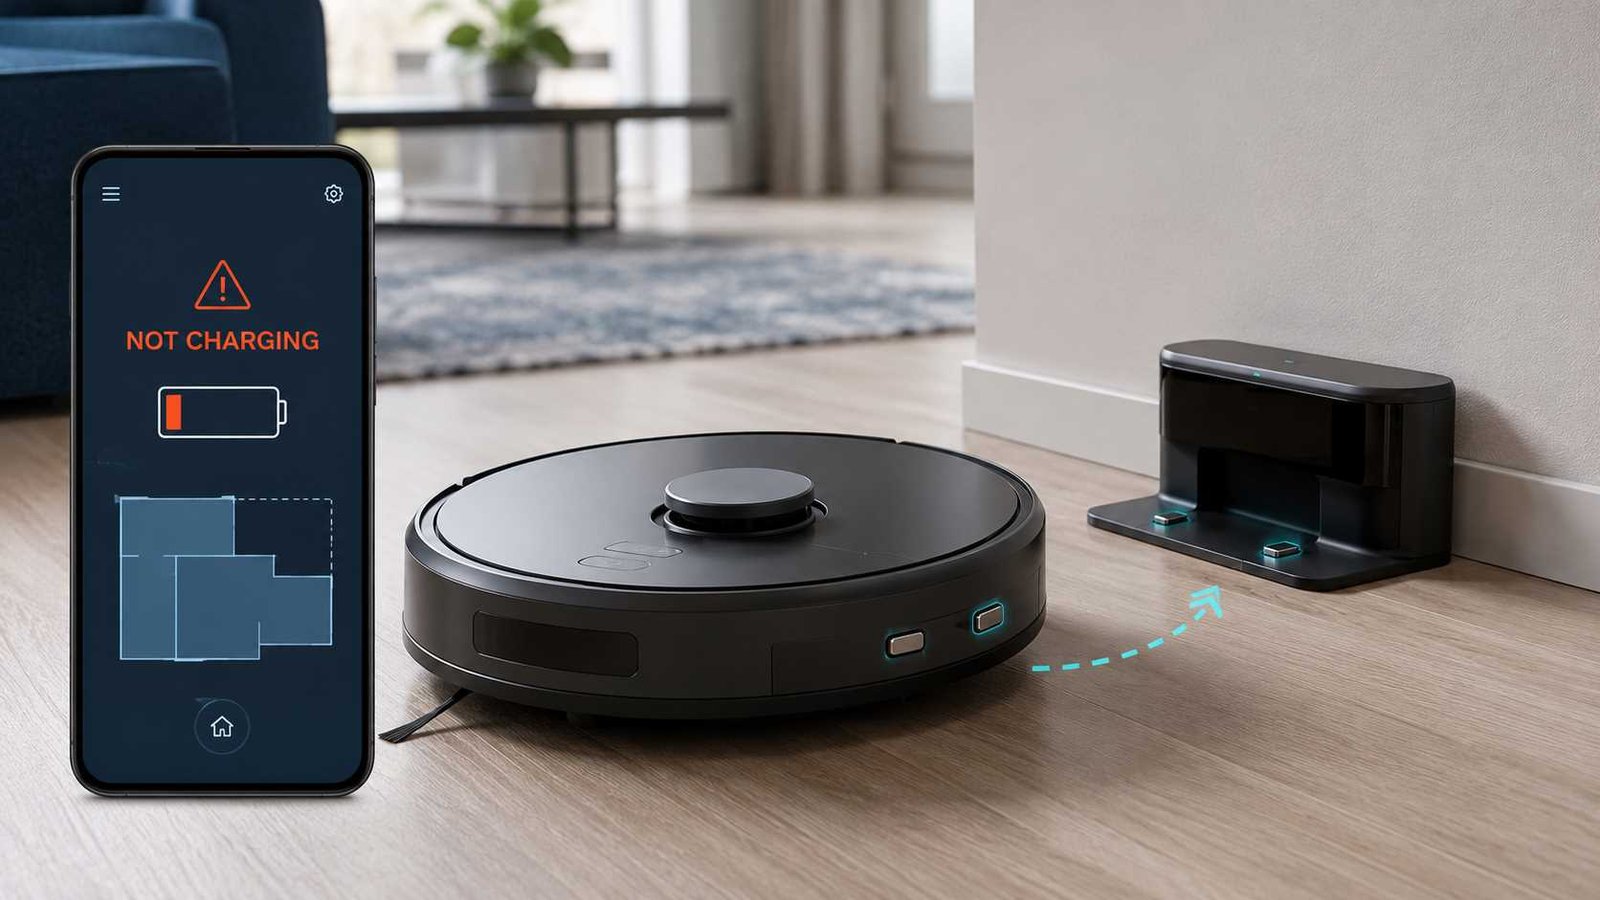
 A robot vacuum that is not charging does not always need a new battery. The problem may be as simple as an unpowered dock, dirty charging contacts, poor alignment, or a loose power connection. Battery temperature, a worn battery pack, or a fault inside the charging station can also prevent charging.
Start by confirming that the wall outlet and charging dock have power. Then switch off the robot, unplug the dock, and inspect the contacts on both the robot and station.
Stop using the vacuum immediately if the battery is swollen, leaking, unusually hot, smoking, or producing a burning smell. Battery and charger problems can create overheating, fire, electric-shock, and burn risks.
Quick Answer
| Item | Details |
|---|---|
| Problem | Robot vacuum does not begin or maintain charging |
| Appliance | Robot vacuum or robot vacuum-and-mop |
| Brands affected | Potentially any brand or model |
| Most common areas | Dock power, charging contacts, and alignment |
| Safe first check | Confirm the outlet works and the dock is powered |
| Repair difficulty | Easy for external checks; advanced for internal faults |
| Can it still be used? | Only if there is no heat, swelling, leakage, damaged wiring, or burning smell |
| Professional help | Needed when safe checks fail or electrical damage is visible |
Why Is My Robot Vacuum Not Charging?
A robot vacuum’s charging system includes more than its battery. The wall outlet, power adapter, charging station, metal contacts, battery pack, temperature protection, and internal charging electronics must all work together.
Common causes include:
- An unpowered wall outlet
- A loose dock power connector
- Dirt or oxidation on the charging contacts
- The robot sitting slightly out of position
- Stuck or damaged charging pins
- A battery that is too hot or cold
- A deeply discharged or deteriorated battery
- A model-specific software or battery error
- A failed adapter, charging station, or internal circuit
Official eufy, Roborock, ECOVACS, Shark, and iRobot guidance commonly begins with dock power, contacts, and correct positioning before moving toward battery replacement or service.
Identify the Exact Charging Symptom
Before resetting the vacuum or buying a battery, identify what it is actually doing.
The charging dock has no light or power indication
This usually points toward the wall outlet, power adapter, power cord, or charging station.
However, dock-light behaviour differs by model. On some Roborock docks, for example, the indicator is illuminated when the robot is absent. Other stations change or switch off their indicator when the robot docks.
Check the user manual before deciding that an unlit dock is faulty.
The dock is powered, but the robot does not respond
The robot may not be touching the station contacts correctly. Dirt, rust, poor alignment, a power switch in the wrong position, or a deeply discharged battery may also cause this symptom.
Charging begins only after moving the robot
This strongly suggests a contact or alignment problem.
Possible causes include:
- Dirty metal pads
- One dock pin not moving freely
- The robot sitting at an angle
- A soft or uneven floor beneath the station
- A worn or damaged contact surface
The robot says it is charging, but the percentage does not rise
Allow enough time for the app or battery indicator to update. If the level remains unchanged after a normal charging period, the possible causes include a deteriorated battery, battery-temperature protection, a charging-station problem, or an internal charging fault.
The battery reaches full charge but drains quickly
This is different from a complete no-charge condition. A robot that reaches full charge but has unusually short runtime may have an ageing battery, increased brush resistance, a blocked wheel, demanding cleaning settings, or another operating problem.
The robot cannot find the dock
A robot that cannot locate its station has mainly a navigation or dock-placement problem. A robot that reaches the dock but does not charge is more likely to have a power, contact, alignment, battery, or charging-hardware problem.
Charging Symptom Guide
| Symptom | Likely area | First safe check |
|---|---|---|
| No dock light or response | Outlet, adapter, cord, or dock | Test the outlet and reseat the power connection |
| Dock powered but robot remains off | Contacts, alignment, battery, or power switch | Inspect contact position and model controls |
| Charges only after repositioning | Contacts or dock pins | Clean and visually inspect both contact sets |
| Starts and stops charging | Poor connection or damaged pin | Place the dock on a level, hard surface |
| Says charging but level stays low | Battery, dock, temperature, or internal fault | Allow charging at room temperature and check for an error |
| Charges fully but dies quickly | Battery condition or excessive operating load | Check runtime, wheels, brushes, and battery age |
| Reaches station but repeatedly backs away | Alignment, obstruction, or contact problem | Clear the station area and inspect the contacts |
Safe Step-by-Step Charging Checks
1. Check the wall outlet
Plug another suitable low-power appliance into the outlet to confirm that it works.
Avoid relying only on the dock light. The station may have a failed indicator, or the light may behave differently when the robot is docked.
Do not use an outlet that is loose, scorched, wet, cracked, or unusually warm.
2. Inspect the power adapter and cable
Check the accessible parts of the power system for:
- A loose plug
- A partially inserted connector
- Cuts or crushed areas
- Exposed wiring
- Melted plastic
- Dark scorch marks
- A burning smell
- Unusual heat
Roborock specifically advises checking that the cable is firmly connected to the dock, while eufy recommends reconnecting the adapter and trying another outlet when the station indicator does not illuminate.
Do not open the adapter or charging station. Internal power-supply testing should be left to the manufacturer or a qualified repair professional.
3. Confirm the dock’s normal indicator behaviour
Look in the manual or official support page for the exact model.
Depending on the station, normal charging may be shown by:
- A light on the robot
- A pulsing battery symbol
- A voice announcement
- An app notification
- A base light changing colour
- A dock light switching off
- A button flashing white
For example, selected ECOVACS models use a flashing white power-button light to show that manual docking has started charging.
4. Switch off the robot and unplug the dock
Before cleaning or touching the charging contacts:
- Remove the robot from the station.
- Switch off the robot where the model provides a power switch.
- Unplug the charging station from the wall.
- Wait briefly before cleaning.
This reduces the chance of shorting the contacts or damaging the charging system.
5. Clean the robot and dock contacts
Locate the metal charging pads on the robot and the matching pins or plates on the dock.
Depending on the model, the robot contacts may be:
- On the underside
- Near the rear underside
- On the back edge
- Beside an evacuation or docking port
Wipe away loose dust and residue using the method approved for the model.
Several eufy and Shark support pages specify a clean, dry cloth. Selected iRobot instructions permit a lightly dampened cloth or melamine foam, while Roborock’s Error 13 instructions allow an alcohol-moistened cloth or eraser on affected contacts.
Because these instructions differ, do not automatically use alcohol, abrasive paper, metal polish, water, or household cleaner. Follow the manual for the exact robot and station.
Allow every contact to dry completely before reconnecting power.
6. Inspect the contacts for damage
Look closely at both sets of contacts.
Check for:
- Black or green residue
- Rust or corrosion
- Deep scratches
- Burn marks
- Bent metal
- A missing contact pad
- One dock pin sitting lower than the other
- A pin that does not move or return normally
ECOVACS specifically advises confirming that the station contacts rebound normally on selected models.
Do not pull, bend, sand, or dismantle a damaged pin unless the manufacturer provides a specific procedure. A broken contact assembly may require dock or robot service.
7. Place the dock correctly
Set the charging station on a firm, level surface.
Keep it:
- Flat against a stable wall where required
- Away from stairs or drop-offs
- Away from direct water exposure
- Clear of loose cables and rugs
- In an area with enough approach space
- In the position used when the robot created its map
A station that moves, tilts, or sinks into thick carpet may not line up properly with the robot.
Clearance requirements differ by model, so use the distances shown in the product manual rather than one universal measurement.
8. Test automatic docking
When the robot still has enough power, place it a short distance in front of the station and use the Home, Dock, Recharge, or Return command.
Automatic docking is useful because the robot should position itself using its own sensors. eufy recommends allowing a powered RoboVac to dock by itself when checking whether its charging pins connect properly.
Observe whether it:
- Reaches the station
- Aligns centrally
- Makes a charging sound
- Shows a charging symbol
- Repeatedly backs away
- Connects only after several attempts
If it cannot find the dock at all, troubleshoot navigation, station placement, mapping, and signal sensors separately.
9. Test careful manual alignment
When the battery is too low for automatic docking, place the robot on the station manually.
Make sure the metal pads meet the corresponding station pins. Wait a few seconds and check for a light, voice message, or app indication.
Both eufy and ECOVACS describe manual docking as an option when the robot cannot power on or return automatically.
Do not place heavy objects on the robot or hold it forcefully against the dock. A robot that charges only while being pushed down may have worn contacts, weak dock pins, or a damaged charging assembly.
10. Let the battery return to room temperature
Some robot vacuums suspend charging when the battery is outside its safe temperature range.
Move the robot and station away from:
- Direct sunlight
- Heating appliances
- Very cold garages
- Freezing rooms
- Hot conservatories
- Other extreme-temperature areas
Allow the robot to return naturally to normal indoor temperature before trying again.
Do not heat the battery with a hair dryer, heater, hot water, or other external heat source.
11. Restart the robot using its model procedure
A restart may clear a temporary control or battery-detection problem, but there is no universal robot-vacuum reset sequence.
Different models may use:
- A physical power switch
- A long press of the power button
- A button combination
- A recessed reset control
- An app restart option
Factory resets may erase Wi-Fi settings, maps, schedules, and room information.
Use the manual for the complete model number. Do not copy another brand’s button sequence simply because the robots look similar.
12. Record any error message
Before performing a factory reset, note:
- The exact error number
- The spoken message
- The LED colour
- The flashing pattern
- The battery percentage
- Whether the dock light changes
- Whether charging begins briefly
- Whether the app recognises the station
Some brands use specific charging codes. Roborock Error 13, for example, relates to a charging problem and its official checks include the contacts, dock power, cable connection, outlet, and power cycling. iRobot also publishes separate errors for battery communication, battery hardware, authentication, and docked-but-not-charging conditions.
Is the Battery, Dock, or Contact System Faulty?
Signs pointing toward the charging contacts
A contact problem becomes more likely when:
- The robot charges after being moved slightly.
- Charging starts only after several docking attempts.
- It connects and disconnects repeatedly.
- One contact has visible residue.
- One station pin appears stuck.
- The robot charges only while pressure is applied.
Clean the contacts and check alignment first. If pressure is still required, stop repeatedly forcing the connection and arrange an inspection.
Signs pointing toward the dock or adapter
The station or power adapter becomes more likely when:
- The outlet works but the dock remains completely unresponsive.
- The station light never appears when the manual says it should.
- Reseating the power connector temporarily restores operation.
- The cable, plug, or adapter is visibly damaged.
- The dock becomes unusually hot.
- The robot charges normally on another confirmed compatible station.
Only test with a charger or station officially approved for the exact model. A connector that physically fits may still have unsuitable electrical specifications.
Signs pointing toward the battery
The battery becomes more likely when:
- The robot reports a specific battery fault.
- It cannot detect the installed battery.
- It reaches full charge but runtime has fallen sharply.
- The charge level remains fixed after the dock and contacts pass basic checks.
- Charging stops because of a temperature or battery-communication error.
- The battery has become swollen, deformed, hot, or leaky.
Battery faults are not always visible. Further manufacturer diagnosis may be needed before ordering a replacement.
What If Cleaning the Contacts Does Not Work?
Use this sequence:
- Confirm the wall outlet works.
- Reseat the dock’s accessible power connection.
- Check the expected dock-light behaviour.
- Inspect both contact sets under good lighting.
- Confirm that dock pins move and return normally.
- Place the station on a firm, level floor.
- Test automatic docking.
- Test careful manual alignment.
- Let the unit return to room temperature.
- Restart it using the exact model procedure.
- Record any error number or app message.
- Contact support before buying parts at random.
When basic checks fail, possible causes include a damaged contact assembly, failed adapter, defective charging station, battery communication problem, temperature sensor fault, battery pack failure, or internal charging-board problem.
Those faults may require electrical measurements or internal disassembly. They are not suitable for general homeowner troubleshooting.
Possible Faulty Parts
| Part | Possible symptom | Recommended level |
|---|---|---|
| Wall adapter or power cord | Dock has no power | Visual homeowner check; replace only with approved part |
| Charging dock | No indicator or no output to robot | Manufacturer or technician diagnosis |
| Dock charging pins | Intermittent charging or pressure needed | External inspection only |
| Robot contact pads | Poor or unstable connection | Cleaning and visual inspection |
| Battery pack | No charge, battery error, or short runtime | Manufacturer-supported replacement where permitted |
| Battery connector | Battery not detected | Technician-level diagnosis |
| Temperature sensor | Charging blocked despite normal room conditions | Technician-level diagnosis |
| Internal charging circuit | Dock recognised but battery never charges | Technician-level diagnosis |
| Main control board | Persistent charging or communication errors | Technician-level diagnosis |
Brand and Model Differences
iRobot Roomba and Braava
iRobot publishes different charging errors for battery detection, communication, hardware, authentication, contact contamination, and docked-but-not-charging conditions. The correct response depends on the error number and product generation.
Contact-cleaning and battery-removal instructions also vary by series. Check the official guide before removing a battery or using a cleaning product.
Roborock
Roborock Error 13 guidance includes cleaning stained or rusty contacts, checking the station indicator, confirming the cable connection, disconnecting power briefly, and trying another outlet.
Not every Roborock charging problem will display Error 13, and newer multi-function docks may use different indicators.
Shark
Shark instructions vary by product family. Some robots have charging pads underneath, while others connect through contacts at the rear.
Current US and UK support pages commonly recommend cleaning the robot and base contacts with a clean, dry cloth.
Selected models also require the robot’s physical power switch to be in the On position before charging.
eufy RoboVac
eufy’s general no-charge guidance advises checking the station’s white indicator, reconnecting the adapter, trying another outlet, cleaning contacts with a dry cloth, and checking alignment.
Restart and reset instructions differ among RoboVac series. Always use the guide for the model shown on the product label.
ECOVACS DEEBOT
ECOVACS support commonly recommends checking outlet power, confirming the robot is switched on, testing automatic or manual docking, wiping both sets of charging contacts, and checking that station contacts rebound normally.
Indicator colours and button behaviour vary among DEEBOT generations.
Xiaomi, Dreame, Narwal, and other brands
The same diagnostic order is useful, but button sequences, contact positions, cleaning products, dock indicators, and replacement parts may differ.
Use the complete model number and regional support page when looking for instructions.
Can You Keep Using the Robot?
You may continue basic external troubleshooting when:
- The housing is intact.
- The power cord is undamaged.
- There is no unusual heat.
- The battery is not swollen.
- There is no smoke or burning smell.
- No liquid has entered the station.
- The contacts are not arcing or badly burned.
Stop using and charging the robot when there is:
- Battery swelling or deformation
- Liquid leakage
- Smoke
- Hissing or popping
- A sharp chemical smell
- A burning smell
- Melting or scorching
- Exposed power wiring
- Repeated sparking
- Abnormal heat from the robot, dock, adapter, or plug
CPSC notes that battery and charger hazards can include overheating, fire, electric shock, and thermal burns. It also recommends treating the battery, charger, and appliance as a complete system rather than mixing unsuitable components.
Do not place a damaged lithium-ion battery in normal household rubbish or general recycling. Contact the manufacturer and local hazardous-waste authority for disposal instructions.
When to Contact the Manufacturer or a Technician
Arrange professional help when:
- The dock remains dead on a confirmed working outlet.
- The adapter or cord is damaged.
- Charging contacts are burned, bent, loose, or missing.
- A dock pin does not move normally.
- Charging starts only while pressure is applied.
- The charging symbol appears but the level never increases.
- The problem returns immediately after correct cleaning.
- A battery, charging, or communication error remains after the official reset.
- A replacement battery did not solve the problem.
- The robot, dock, plug, or adapter becomes abnormally hot.
- Internal wiring, voltage testing, or circuit-board diagnosis would be required.
Keep the robot’s model number, serial number, app error, light pattern, purchase details, and troubleshooting results available when contacting support.
Frequently Asked Questions
Why is my robot vacuum not charging even though it is on the dock?
The robot may be slightly misaligned, the contacts may be dirty, or the dock may not have power. Confirm the outlet, inspect the adapter, unplug the station, clean both contact sets according to the model manual, and dock the robot again.
How do I know whether the robot vacuum dock has power?
Check the station indicator described in the manual and test the wall outlet with another suitable appliance. Do not assume every dock light remains on while charging because indicator behaviour differs by model.
What should I use to clean robot-vacuum charging contacts?
Start with the cleaning method stated in the manual. Many manufacturers recommend a clean, dry cloth. Selected models permit a lightly dampened cloth, melamine foam, alcohol solution, or an eraser, but these methods are not universal.
Why does my robot vacuum charge only when I press it against the dock?
This usually points toward poor alignment, dirty contacts, a stuck dock pin, worn contact surfaces, or physical damage. Do not hold the robot down for long-term charging. Inspect the external contacts and arrange service if the problem continues.
Can a completely flat robot-vacuum battery take time to respond?
Yes. A deeply discharged robot may not power on immediately when first placed on the station. Carefully align it with the dock and allow it to remain connected for the charging period recommended in its manual. If there is still no charging indication, continue with dock, contact, temperature, and battery checks.
How can I tell whether the battery is faulty?
A battery is more likely when the dock has power, the contacts are clean, the robot is aligned correctly, and charging still fails. A specific battery error, severe runtime loss, failure to detect the battery, swelling, leakage, or abnormal heat also points toward battery trouble.
Should I reset the robot when it will not charge?
A restart may help, but use only the procedure for the exact model. Do not perform a factory reset first because it may erase maps, schedules, Wi-Fi settings, and room information without correcting a physical charging problem.
Is it safe to leave a robot vacuum on its charging dock?
Robot vacuums are generally designed to return to and remain on their compatible stations during normal use. Do not leave the unit charging when the battery, dock, adapter, cord, or plug is damaged, unusually hot, swollen, leaking, smoking, or producing a burning smell.

Emily Carter is an Australian home-appliance safety editor with 9 years of experience researching washers, air conditioners, refrigerators, and coffee machines. She checks troubleshooting steps for accuracy, regional model differences, and homeowner safety before publication.