
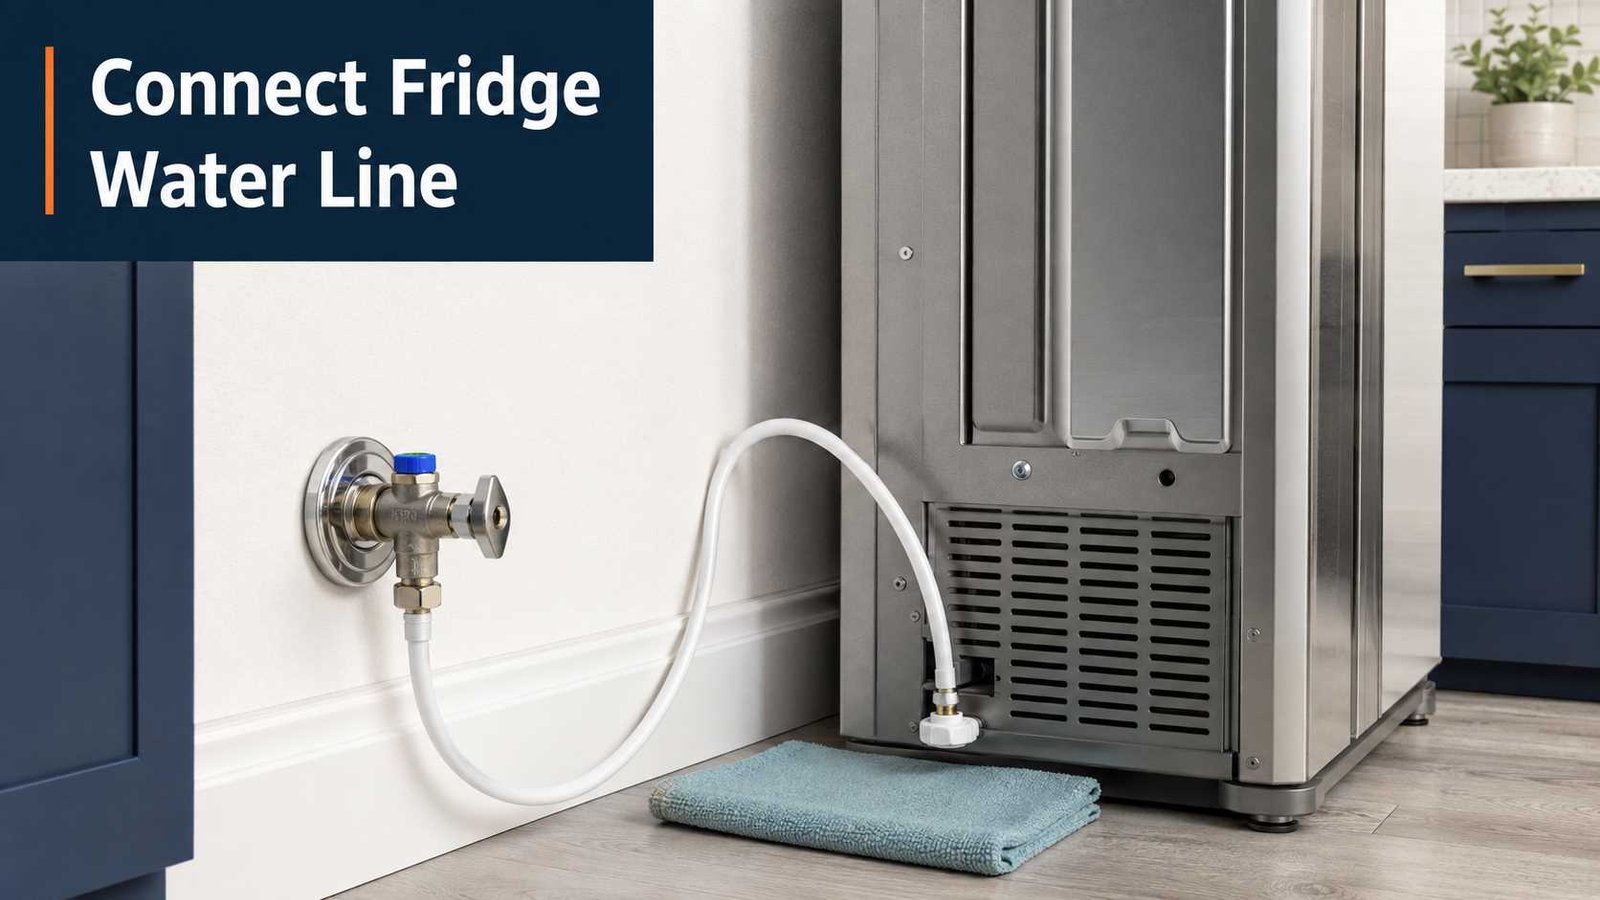
 To connect a water line to a refrigerator, you normally run compatible water-supply tubing from a cold-water shutoff valve to the refrigerator’s water inlet, secure the correct fitting, turn the water supply back on, and carefully check the connections for leaks.
Many refrigerators use 1/4-inch (6.35 mm) outside-diameter tubing, although you should check the installation manual for your exact refrigerator before buying tubing or fittings. Whirlpool currently specifies 1/4-inch soft copper or PEX tubing for many refrigerators.
If your refrigerator already has an accessible shutoff valve behind it or under a nearby sink, connecting the line is usually manageable for a homeowner. If you need to cut into household plumbing, install pipes inside a wall, or repair a damaged shutoff valve, consider using a qualified plumber.
Safety note: Turn off the water supply before opening any connection. If the refrigerator’s installation instructions require electrical disconnection for the work you are doing, unplug it or switch off its circuit as directed by the manufacturer.
| Item | Typical guidance |
|---|---|
| Water source | Cold potable water supply |
| Common tubing size | 1/4-inch outside diameter |
| Typical refrigerator connection | Compression fitting or model-specific connector |
| Copper connection | Nut and ferrule are commonly used |
| First step | Shut off the water supply |
| After connection | Turn water on and inspect for leaks |
| Before drinking | Flush according to the refrigerator manual |
| DIY difficulty | Usually moderate with an existing shutoff |
| Call a professional | For new household plumbing, damaged valves, or persistent leaks |
Whirlpool identifies 1/4-inch copper or PEX tubing for many current refrigerator installations, while LG and Samsung provide model-dependent compression-fitting procedures.
What You Need Before Connecting the Refrigerator
Before buying a refrigerator water-line kit, inspect the appliance and the existing plumbing.
You will typically need some combination of:
- Compatible 1/4-inch water tubing
- Correct refrigerator connector or compression fitting
- Compression nut
- Ferrule or sleeve when required
- Accessible cold-water shutoff valve
- Adjustable wrench
- Tubing cutter if the tubing must be shortened
- Towels and a container for small amounts of water
Do not assume every refrigerator uses exactly the same fitting. Whirlpool, for example, sells different water-line kits, including products with 1/4-inch fittings and PEX tubing. Compatibility should be checked against the refrigerator model.
First Check: Is Your Refrigerator Actually Plumbed?
Not every refrigerator with a water dispenser needs a household water line.
Some models are non-plumbed and use an internal refillable water tank instead. LG Australia currently sells both plumbed and non-plumbed refrigerator configurations, including models where the internal tank supplies the dispenser and ice maker.
Check your manual before installing anything.
Refrigerator Water Line Parts Explained
Understanding the fitting makes the installation much easier.
Water Tubing
The tubing carries water from the household shutoff valve to the refrigerator.
For many Whirlpool refrigerators, the specified supply is 1/4-inch (6.35 mm) outside-diameter soft copper or PEX tubing. Other models may be supplied with plastic tubing or a manufacturer-specific hose.
Compression Nut
The compression nut threads onto the fitting and compresses the sealing components as it is tightened.
Ferrule or Sleeve
A ferrule is a small ring fitted around certain types of tubing, particularly traditional copper compression connections.
Samsung’s installation guidance instructs users working with copper tubing to place the compression nut and ferrule onto the tubing before connecting it to the compression fitting.
Shutoff Valve
The shutoff valve allows you to stop water to the refrigerator without necessarily shutting off all water to the home.
It should remain accessible after installation.
Union or Coupling
A union joins two compatible sections of refrigerator water tubing.
Some manufacturer water-line kits include a union for this purpose. Whirlpool, for example, offers a refrigerator installation kit containing a flexible hose and brass union.
How to Connect a Water Line to a Refrigerator
The following procedure applies to a common refrigerator installation where an appropriate cold-water shutoff valve is already available.
Your refrigerator’s installation manual takes priority if its procedure differs.
1. Turn Off the Water Supply
Locate the shutoff valve supplying the refrigerator and close it.
If there is no dedicated refrigerator valve, determine where the proposed supply comes from before beginning.
Do not disconnect a pressurized water line.
2. Move the Refrigerator Forward Carefully
Pull the refrigerator far enough away from the wall to reach the rear water connection.
Avoid damaging:
- Flooring
- Power cord
- Existing tubing
- Refrigerator doors
- Nearby cabinetry
Do not sharply bend or pull an existing water line.
3. Inspect the Tubing and Fittings
Check the tubing for:
- Cracks
- Flattened areas
- Kinks
- Corrosion
- Damaged threads
- Worn fittings
Replacing damaged tubing is safer than trying to make a questionable connection seal through additional tightening.
4. Prepare the Water Line
If you are using conventional soft copper tubing, make sure the end is cut square and is not crushed or distorted.
Whirlpool’s installation guidance describes placing the compression sleeve and nut onto 1/4-inch copper tubing before inserting the tubing fully into the water-supply connection.
Plastic and PEX connections may use a different arrangement. Follow the fitting instructions supplied with the refrigerator or water-line kit.
5. Install the Compression Nut and Ferrule When Required
For a typical copper compression connection, the basic arrangement is:
Tubing → compression nut → ferrule → fitting
Slide the compression nut onto the tubing first, followed by the ferrule.
Insert the tubing fully into the fitting.
Samsung gives this arrangement for copper tubing in its refrigerator water-supply guidance.
Do not automatically add a ferrule to every plastic line. Samsung distinguishes its plastic-tubing connection from its copper connection and directs users of certain plastic lines to insert the molded tubing end into the compression fitting.
How to Install a Compression Fitting on a Refrigerator Water Line
Once the tubing is fully seated, thread the compression nut onto the fitting.
Start the nut by hand where possible to reduce the risk of cross-threading.
Then tighten it securely with the appropriate wrench.
The key is secure, not excessively tight.
Samsung specifically warns against overtightening the refrigerator’s compression nut.
Overtightening does not guarantee a better seal. It may damage the ferrule, tubing, fitting, or threads.
If a connection continues leaking after correct assembly, shut the water off and inspect the parts instead of repeatedly applying more force.
6. Connect the Other End to the Cold-Water Supply
Connect the supply line to the dedicated cold-water shutoff using the fitting specified for that valve and tubing.
The refrigerator should be supplied with cold potable water.
Samsung’s refrigerator installation guidance similarly directs the refrigerator supply toward a cold drinking-water source.
If your kitchen does not already have an appropriate refrigerator shutoff, adding one may require household plumbing work. That is different from simply hooking a refrigerator to an existing valve.
7. Turn the Water Supply Back On
Open the shutoff valve gradually.
Watch the refrigerator connection and the supply-valve connection as the line becomes pressurized.
Keep a dry towel nearby. Even a small amount of moisture is easier to notice against a dry surface.
8. Check Carefully for Leaks
Inspect:
- Refrigerator inlet
- Compression fitting
- Shutoff valve
- Any union used to extend the line
- Entire visible length of tubing
LG instructs users to turn the water supply on after connecting the refrigerator and then inspect for leakage.
If you see water, shut the valve off before adjusting the connection.
9. Leave Slack Behind the Refrigerator
Do not make the supply line so short that it becomes tight when the refrigerator is pulled forward.
Leave a smooth service loop or enough slack for normal appliance movement.
Avoid:
- Sharp bends
- Pinching the tube against the wall
- Running the refrigerator wheel over it
- Folding excess tubing into a tight kink
10. Move the Refrigerator Back Into Position
Push the refrigerator back slowly while watching the supply line.
Stop if the tubing begins to twist, flatten, or become trapped.
A leak-free connection can still fail later if the refrigerator crushes or repeatedly strains the line.
How Do I Install a Refrigerator Water Line Kit?
A refrigerator water-line kit typically contains tubing and some or all of the fittings required to supply the appliance.
The simplest situation is:
Existing cold-water shutoff → water-line kit → refrigerator
Check three things before buying a kit:
- The refrigerator’s required tubing size
- The connector at the refrigerator
- The connector at the shutoff valve
A kit described as universal does not automatically mean it is correct for every refrigerator or every household valve.
Whirlpool currently offers kits using 1/4-inch fittings and PEX tubing, while other Whirlpool kits use flexible hoses or other configurations.
What If There Is No Refrigerator Shutoff Valve?
Some installations use an accessible cold-water connection beneath a nearby sink. However, installing a tee, valve, or new household water branch involves plumbing beyond the refrigerator itself.
If you’re uncertain about the household plumbing connection, use a plumber rather than improvising a tap into an existing pipe.
How to Connect Two Refrigerator Water Lines Together
Sometimes an existing refrigerator line is too short.
Two compatible sections can often be joined using a properly sized union or coupling.
For a common 1/4-inch refrigerator supply, this may be a 1/4-inch union designed for the tubing material being used.
Whirlpool sells refrigerator water-line kits that include unions, confirming that a properly specified union is a normal connection method in suitable installations.
Before Joining Two Lines
Check that:
- Both tubing sections have the same compatible dimensions.
- The union is approved for the tubing material.
- Both tube ends are clean and undamaged.
- The fitting is accessible for future inspection.
- The joined line can lie without tension or kinks.
Do not join refrigerator tubing with tape, glue, improvised hose clamps, or an unverified connector.
When Replacing the Entire Line Is Better
A new continuous line may make more sense when:
- The old tubing is brittle.
- Multiple joints already exist.
- There are signs of corrosion.
- A line has been repeatedly kinked.
- You cannot identify the old tubing material.
- A previous fitting has leaked.
Fewer connections generally mean fewer potential leak points.
Should I Use Copper, Plastic, or PEX Tubing?
There is no single material that should be recommended for every refrigerator.
Current Whirlpool support information specifies 1/4-inch soft copper or PEX for many refrigerators.
Other appliances may arrive with plastic tubing, a flexible hose, or their own connector system.
The safest rule is simple:
Use a tubing type and fitting specifically permitted by your refrigerator’s installation instructions.
Do not replace a manufacturer-specified fitting with something that merely appears to fit.
How to Flush a New Refrigerator Water Line
New water lines should normally be flushed according to the refrigerator manufacturer’s instructions.
Whirlpool’s installation guidance includes flushing new tubing until the water runs clear before completing installation.
Refrigerator manufacturers may also require dispensing additional water after installation to clear air and prepare the water system.
The required amount can differ by model, so follow the manual rather than relying on one universal number.
You may initially notice:
- Air sputtering from the dispenser
- Intermittent water flow
- Small air bubbles
If poor flow continues after the recommended flushing procedure, investigate the supply line and filter rather than assuming that trapped air is still the cause.
Refrigerator Water Line Leaking After Installation
A new connection should remain dry.
If you see water, shut off the refrigerator’s supply valve before investigating.
Leak at the Compression Fitting
Possible causes include:
- Tubing not fully inserted
- Incorrect ferrule position
- Damaged tube end
- Cross-threaded nut
- Incorrect fitting
- Damaged ferrule
- Excessive tightening
Reassemble the fitting according to the manufacturer’s instructions.
Do not keep tightening indefinitely.
Leak From Plastic Tubing
Check whether the refrigerator requires a molded-end connection, insert, or another model-specific part.
Samsung, for example, provides different instructions for copper tubing and plastic tubing.
Leak at the Shutoff Valve
If the household shutoff valve itself is corroded, cracked, loose, or leaking around its stem or pipe connection, stop refrigerator installation and address the plumbing problem first.
No Water After Connecting the Refrigerator
If the installation is dry but the dispenser or ice maker receives no water, start with simple checks.
Check the shutoff valve
Make sure the refrigerator water valve is fully open.
Look for a kink
A line can become folded when the refrigerator is pushed back into place.
Check the refrigerator filter
If the model has a water filter, make sure it is installed and seated according to its instructions.
Flush the system
A newly connected line can contain air.
Follow the model’s initial flushing procedure.
Check the connection arrangement
Some refrigerators have model-specific tubing layouts.
Samsung notes, for example, that selected refrigerator configurations can have more than one water-line connection. This is another reason to identify the exact model before assuming a generic hookup arrangement.
If water still does not flow after the basic checks, consult the model-specific troubleshooting documentation.
Regional and Model Differences Matter
Refrigerator water-line installation is not completely standardized worldwide.
A US refrigerator guide may describe a 1/4-inch compression connection, while another model sold in Australia, New Zealand, the UK, or Ireland may be supplied with a different connector arrangement.
There are also non-plumbed refrigerators that require no household water connection at all. LG Australia currently lists refrigerators with refillable internal tanks as well as conventional plumbed products.
For that reason, use generic instructions to understand the process, but use your refrigerator’s own installation manual to identify the actual parts.
When Should You Call a Plumber or Appliance Professional?
A straightforward hookup to a suitable existing shutoff is different from modifying household plumbing.
Consider professional help if:
- There is no suitable cold-water shutoff.
- Pipes need to be cut or rerouted.
- Water lines must be installed inside walls or floors.
- The existing valve is corroded or damaged.
- You cannot identify the required fitting.
- A connection keeps leaking after correct reassembly.
- The refrigerator requires a manufacturer-specific installation procedure.
- Local plumbing rules require professional work.
Whirlpool also notes that more complicated installations, including longer runs or lines routed through floors or walls, may warrant professional installation.
Refrigerator Water Line Safety Checklist
Before considering the installation complete:
- Confirm the refrigerator is designed for a plumbed connection.
- Check the model-specific installation manual.
- Use the specified tubing diameter and material.
- Connect only to an appropriate cold potable-water supply.
- Shut the water off before opening fittings.
- Use the correct nut, ferrule, union, or supplied connector.
- Do not overtighten compression fittings.
- Restore the water slowly.
- Inspect every connection for moisture.
- Flush the new system as directed by the manufacturer.
- Leave enough tubing for refrigerator movement.
- Make sure the tubing is not pinched when the refrigerator is pushed back.
Frequently Asked Questions
How do you hook up a water line to a refrigerator?
Shut off the cold-water supply, connect compatible tubing between the shutoff valve and refrigerator inlet using the specified fittings, restore the water, inspect for leaks, and flush the system according to the refrigerator manual.
Many current refrigerators use 1/4-inch supply tubing, but verify your model before buying components.
How do I install a refrigerator water line kit?
First confirm that the kit matches your refrigerator and household shutoff. Connect the supplied tubing between the cold-water valve and refrigerator using the included or manufacturer-specified fittings. Then turn the water back on, check for leaks, and complete the required flushing procedure.
How do I install a compression fitting on a refrigerator water line?
For a conventional copper connection, slide the compression nut onto the tubing followed by the ferrule, insert the tubing fully into the fitting, and tighten the nut securely without overtightening. Samsung describes this arrangement for copper refrigerator supply tubing.
Plastic tubing may require a different fitting arrangement.
How do you connect two refrigerator water lines together?
Use a union or coupling specifically sized and approved for the tubing being joined. For common 1/4-inch refrigerator tubing, a compatible 1/4-inch union may be appropriate. Avoid improvised splices.
Do I need to connect my refrigerator to a water line?
Only if the refrigerator’s water or ice system is designed for a plumbed supply. Some refrigerators have refillable internal tanks and do not need a permanent household water connection.
Can I connect a refrigerator to a hot-water line?
A refrigerator’s ice and water system should be connected to the appropriate cold drinking-water supply, not the home’s hot-water line.
Why is my new refrigerator water line leaking?
Common possibilities include an incorrectly seated tube, damaged fitting, incorrect ferrule placement, incompatible components, cross-threading, or damage caused by excessive tightening.
Turn the water off before correcting the connection.
Why is there no water after connecting the refrigerator?
Check whether the shutoff valve is open, the tubing is kinked, the filter is installed correctly, and the new line has been flushed. If those checks are normal, consult the refrigerator’s model-specific troubleshooting information.

Daniel Brooks is a US-based appliance troubleshooting researcher with 12 years of experience studying washer, dryer, refrigerator, and dishwasher faults. He reviews manufacturer manuals and converts technical error codes into safe, practical guidance for homeowners.