
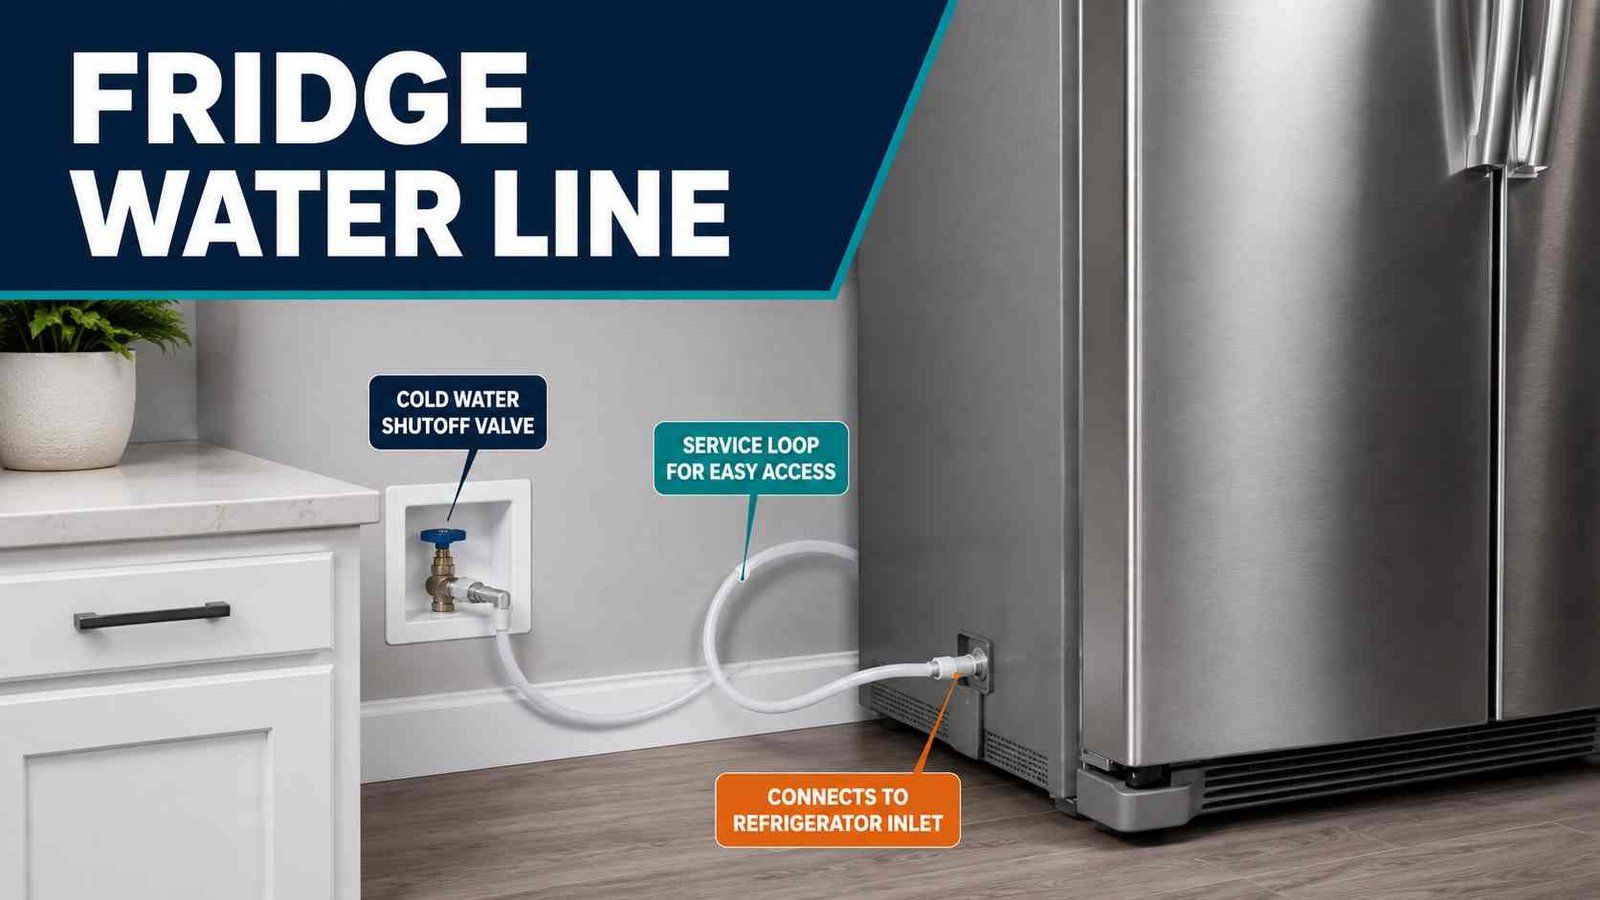
 Running a water line for a refrigerator means creating a safe path from your home’s cold potable-water supply to the refrigerator’s water inlet. On many North American refrigerators, the final supply connection uses 1/4-inch (6.35 mm) tubing, although the approved material, fittings, water pressure, and connection method vary by model.
If you already have an accessible refrigerator shutoff valve, this can be a manageable DIY job: route the correct tubing, leave enough slack behind the refrigerator, flush the line, connect it, and check carefully for leaks.
If you need to cut into household plumbing, install a new valve inside a wall, or drill where electrical wiring or other pipes may be hidden, stop and use a qualified plumber. LG specifically recommends professional help when the home’s water supply must be modified.
Quick Answer
| Item | General guidance |
|---|---|
| Water source | Cold potable-water supply |
| Common North American tubing size | 1/4-inch / 6.35 mm O.D. on many models |
| Common tubing materials | Copper or PEX on models that approve them |
| Shutoff valve | Should be accessible and suitable for the installation |
| Extra tubing | Leave a service loop behind the refrigerator |
| Before connecting fridge | Flush the new supply tubing |
| Final check | Turn water on and inspect every accessible connection |
| DIY difficulty | Moderate if a proper valve already exists |
| Call a plumber | When household plumbing must be altered |
Whirlpool currently specifies 1/4-inch O.D. soft copper or PEX between the shutoff valve and refrigerator for the models covered by its guidance, while Samsung recommends a 1/4-inch copper installation kit in its US instructions. That is why your refrigerator’s own manual should override generic advice.
Before You Run the Refrigerator Water Line
Confirm That Your Refrigerator Actually Needs Plumbing
Not every refrigerator with a dispenser needs a permanent household water connection.
Some models are plumbed, meaning they connect directly to the home’s water supply. Others use a refillable internal tank.
Samsung UK and LG Australia both sell or document plumbed and non-plumbed refrigerator designs. Check your model before buying tubing or modifying plumbing.
Look for:
- A water inlet connection on the refrigerator
- Installation instructions referring to a household water supply
- An automatic ice maker requiring water
- A dispenser supplied from household plumbing rather than an internal tank
Read the Model-Specific Installation Manual
The connection point may be located differently on different refrigerators. Tubing material, pressure requirements, fittings, filters, and flushing instructions can also vary.
For example, Samsung notes that its RS27T and RS22T refrigerators have two water lines that must be connected correctly.
Do not assume a procedure from another refrigerator will be identical.
Decide Whether This Is Still a DIY Job
Running tubing from an existing shutoff valve is quite different from creating a new branch in the home’s plumbing.
Consider a plumber when:
- There is no refrigerator shutoff valve
- The household supply must be cut or modified
- Plumbing is corroded or damaged
- The route goes through finished walls
- You do not know where electrical cables or pipes are located
- A leak would be hidden under flooring or inside a wall
- Local plumbing rules require professional installation
LG states that water-supply arrangements vary by home and recommends contacting a qualified plumber when the supply itself needs modification.
What You Need
For a straightforward installation with an existing shutoff valve, you will normally need:
- Refrigerator-approved water tubing
- Correct refrigerator and valve fittings
- Adjustable wrench where specified
- Container or bucket for flushing
- Towels for checking small leaks
- Tubing clips where appropriate
- Your refrigerator’s installation manual
Do not buy fittings based on appearance alone. Refrigerator connections vary.
Samsung US, for example, recommends a 1/4-inch copper tubing kit with compression hardware for the models covered by its instructions. Whirlpool supports 1/4-inch copper or PEX on many of its refrigerators.
Copper or PEX for a Refrigerator Water Line?
There is no material that is automatically correct for every refrigerator.
Copper
Copper is widely used for refrigerator water supplies and is specifically recommended by Samsung US in its current general refrigerator installation guidance.
It resists kinking reasonably well when routed correctly, but sharp bends can damage it.
PEX
Whirlpool lists soft copper or PEX as acceptable for many current refrigerators.
PEX is flexible and convenient when the supply must pass through cabinets or around gentle turns, but the refrigerator manufacturer must approve the material and connection method.
What About Generic Plastic Tubing?
Do not assume inexpensive plastic tubing is acceptable.
Samsung’s US guidance specifically says its plastic tubing kit is not recommended, even though it explains how an approved plastic connection would be assembled.
The safest approach is simple: use the tubing type and fittings specified for your refrigerator.
Where Should the Refrigerator Water Line Come From?
The line must ultimately connect to a cold potable-water supply.
Whirlpool, Samsung, and LG all specify cold water for their applicable refrigerator installations.
Common routes include:
An Existing Refrigerator Valve
This is the easiest situation. The home already has an accessible shutoff intended for the refrigerator.
You normally only need to confirm that the valve operates correctly and then route the refrigerator-approved tubing from that point.
Under the Kitchen Sink
In many kitchens, the refrigerator is reasonably close to the sink’s cold-water plumbing.
A properly installed refrigerator supply connection can then be routed through the sides or backs of adjacent cabinets.
If no suitable shutoff connection exists under the sink, modifying the plumbing is the point where a plumber becomes the safer choice.
Basement or Crawl Space
A refrigerator supply may approach from below where the building layout allows it.
The important issues are protection from damage, freezing, abrasion, sharp bends, and inaccessible leaking connections.
LG specifically cautions that copper tubing should only be installed where temperatures remain above 32°F / 0°C.
Through a Wall or Floor
A water line can sometimes be routed through a wall or floor, but blind drilling introduces another risk: hidden pipes and electrical cables.
Do not drill until you know what is behind or below the surface.
If the path is uncertain, choose another route or use a professional installer.
How to Run a Water Line for a Refrigerator
Step 1: Plan the Full Route
Start at the shutoff valve and trace the path to the water inlet on the refrigerator.
Look for the shortest practical route that avoids:
- Sharp bends
- Pinch points
- Heat sources
- Freezing areas
- Moving drawers
- Cabinet hinges
- Sharp metal edges
- Areas where tubing could be crushed
Do not measure only the straight-line distance.
You also need additional tubing behind the refrigerator so the appliance can be pulled forward later.
Step 2: Leave Enough Tubing for a Service Loop
A service loop is one of the most important parts of the installation.
Whirlpool recommends leaving a coil of copper or PEX behind the refrigerator so the appliance can be moved out for cleaning or service without pulling the tubing tight.
The loop should curve naturally rather than being folded into tight bends.
Without enough slack, pulling the refrigerator forward can:
- Stress the fitting
- Kink the tubing
- Pull the line from its connection
- Create a leak behind the appliance
Step 3: Shut Off the Water
Close the valve supplying the refrigerator line before attaching tubing.
If the installation involves more extensive household plumbing, shutoff requirements depend on the home’s plumbing arrangement. Do not cut or open plumbing unless you understand how the water supply is isolated.
Samsung Australia’s installation guidance similarly begins its household connection procedure by shutting off the main water supply.
Step 4: Connect the Tubing to the Existing Shutoff Valve
Follow the instructions supplied with your refrigerator and water-line kit.
Compression fittings are common, but their exact assembly depends on tubing material and manufacturer.
Samsung warns against overtightening its compression connection because excessive tightening can cause leakage.
The connection should be secure, but more force is not always better.
A Note About Saddle Valves
Do not automatically install a piercing saddle valve just because an inexpensive refrigerator kit includes one.
Whirlpool warns that piercing-type and smaller 3/16-inch saddle valves can reduce water flow and clog more easily. It also tells homeowners to check whether saddle valves comply with local plumbing codes.
Where a new household shutoff is needed, an approved plumbing connection installed according to local code is preferable.
Step 5: Route the Tubing Toward the Refrigerator
Feed the tubing along your planned route without pulling it tight.
Through Cabinets
When going through adjacent cabinets:
- Keep tubing away from drawer slides and hinges
- Protect it from sharp edges
- Use broad curves
- Secure it enough that stored objects cannot repeatedly catch it
- Leave the final section loose enough for refrigerator movement
Through a Basement or Crawl Space
Protect the tubing from physical damage and freezing.
Avoid unsupported locations where the line could be snagged or crushed.
Through a Wall or Floor
Only drill where you have established that the location is clear of wiring, plumbing, structural hazards, and other services.
Do not make exploratory holes around unknown utilities.
Step 6: Avoid Kinks and Pinching
A refrigerator can be perfectly connected yet still have weak water flow because the tubing is kinked behind it.
Whirlpool identifies kinking as a common cause of restricted water flow and specifically warns against pushing the refrigerator far enough back to pinch its supply line.
Use smooth bends rather than sharp 90-degree folds.
Step 7: Flush the New Supply Tubing
Before making the final refrigerator connection, put the free end of the tubing into a suitable container.
Open the supply and allow water to run until it is clear, then shut the supply off again.
LG explicitly instructs installers to flush the supply tubing before connecting it to the refrigerator.
This helps remove material introduced during installation.
Step 8: Unplug the Refrigerator
Before making the refrigerator-end connection, disconnect refrigerator power.
LG’s installation instructions specifically tell users to unplug the refrigerator before connecting the water line.
Step 9: Connect the Line to the Refrigerator
Locate the appliance water inlet.
Its position and connection style vary by model, so follow your refrigerator manual rather than forcing a generic fitting onto it.
With a typical compression connection:
- Confirm that the tubing end is clean and undamaged.
- Install the specified nut, ferrule, sleeve, insert, or connector for your tubing.
- Seat the tubing fully.
- Tighten according to the manufacturer’s instructions.
- Do not overtighten.
LG notes that a connector or adapter may be needed when the supply line size differs from the refrigerator connection.
Step 10: Turn the Water On Slowly and Check for Leaks
Restore the water supply.
Inspect:
- The household shutoff connection
- Any accessible intermediate fittings
- Filter connections where applicable
- The refrigerator inlet
- The tubing itself
Use a dry towel or tissue around a fitting if a tiny leak is difficult to see.
Samsung instructs users who find leakage to turn off the main water supply, recheck the connections, and correct the connection before continuing.
Do not ignore a slow drip. A small leak hidden behind a refrigerator can damage flooring, cabinets, or walls over time.
Step 11: Flush the Refrigerator’s Water System
After the water supply is connected, the dispenser normally needs to be flushed.
Follow your refrigerator’s manual for the required amount.
The quantity is not universal.
For example:
- Samsung US instructs users of the refrigerators covered by its guide to dispense one gallon before using the water.
- LG US instructs users in its current general guide to dispense at least two gallons.
- Samsung Australia’s applicable installation guide specifies approximately 10 litres or 6–7 minutes of dispensing.
These differences are exactly why a generic article should not give one flushing number for every refrigerator.
Step 12: Push the Refrigerator Back Carefully
This is where many otherwise good installations go wrong.
Move the refrigerator back gradually while checking that the tubing forms a relaxed service loop.
Make sure the line is not:
- Folded
- Trapped under a wheel
- Pinched against the wall
- Pulled tight
- Caught under the appliance
Whirlpool specifically advises against pushing the refrigerator so far back that the supply line becomes pinched.
Check the connections again after the refrigerator is in position.
Common Refrigerator Water-Line Installation Mistakes
Connecting to Hot Water
Use a cold potable-water supply.
Samsung Australia explicitly warns that connecting the filtering hose to hot water can cause the water filter to malfunction.
Using the Wrong Tubing
A tube that physically fits is not necessarily approved for continuous water pressure or for your refrigerator.
Check the appliance manual.
Leaving No Service Loop
A tight line can pull on its fittings when the refrigerator is moved.
Leave enough tubing for servicing.
Overtightening Fittings
Compression connections can leak when assembled incorrectly or overtightened.
Samsung specifically warns against overtightening its applicable compression fitting.
Failing to Flush the Line
Both the new tubing and refrigerator water circuit may require flushing before normal use.
Pinching the Tubing Behind the Refrigerator
Restricted tubing can cause weak dispenser flow and reduced ice production.
A visual check behind the appliance should be one of the first troubleshooting steps.
Water Dispenser Has Low Flow After Installation
If water comes out slowly after installing the new supply, check the simple external causes first.
1. Make Sure the Shutoff Valve Is Fully Open
A partly closed valve restricts the supply.
2. Check the Entire Visible Line for Kinks
Look especially at the service loop behind the refrigerator.
Whirlpool identifies kinks as a cause of reduced water flow.
3. Check the Filter
If your refrigerator uses a water filter, make sure it is correctly installed and suitable for the model.
4. Check Water Pressure Against the Manual
Do not use one universal pressure target.
For example, Samsung US states that the ice maker covered by its current guide requires at least 30 psi, while LG’s current US guide lists 20–120 psi for its applicable installation.
Your model’s specification is the one that matters.
5. Call a Plumber if the Household Supply Is Weak
If the line is straight, valve fully open, and refrigerator installed correctly but household pressure remains inadequate, the supply needs professional assessment.
What If the New Refrigerator Water Line Leaks?
Turn off the refrigerator water supply if you find active leakage.
Then inspect the accessible connection.
Look for:
- Tubing that is not fully seated
- A loose fitting
- Damaged tubing
- A kink immediately beside a fitting
- Incorrect compression hardware
- Cracks in the water line
Whirlpool recommends inspecting both the household-supply connection and the connection at the back of the refrigerator when a leak appears.
If the leak is inside a wall, floor, cabinet structure, or inaccessible plumbing connection, stop troubleshooting and contact a plumber.
Regional and Model Differences
United States and Canada
A 1/4-inch / 6.35 mm supply is common on North American refrigerators, but approved materials and fittings vary by brand and model. Whirlpool currently supports 1/4-inch soft copper or PEX on the refrigerators covered by its general guidance, while Samsung US recommends a 1/4-inch copper kit.
United Kingdom and Ireland
Do not assume every water-and-ice refrigerator is plumbed.
LG UK instructs owners of plumbed fridge freezers to use the correct connector for the installed valve type and check for leaks and steady flow.
Australia and New Zealand
Plumbed and refillable-tank refrigerators are both available. LG Australia clearly distinguishes between these two designs.
There can also be stricter installation requirements. Samsung Australia’s applicable side-by-side refrigerator guidance says the water line must be connected by a qualified technician.
Always follow local requirements and your model’s installation instructions.
When to Call a Plumber
A refrigerator hose is simple. Household plumbing is not always simple.
Use a qualified plumber when:
- There is no suitable cold-water shutoff
- A new plumbing branch needs to be created
- Pipes must be cut or substantially modified
- The existing valve leaks or is corroded
- The line must pass through an uncertain wall or floor cavity
- You cannot identify hidden utilities before drilling
- Water pressure is outside the refrigerator’s requirements
- There is leakage inside the building structure
- Local rules require professional installation
- The manufacturer specifically requires qualified installation
LG recommends professional assistance when modifications to the home’s water supply are necessary.
Final Installation Checklist
Before considering the job finished, confirm that:
- The refrigerator is designed for a plumbed connection.
- The water comes from a cold potable supply.
- Tubing type and diameter match the refrigerator instructions.
- An accessible shutoff valve is available.
- The tubing is protected from heat and freezing.
- There are no sharp bends or kinks.
- A service loop remains behind the refrigerator.
- The new supply tubing was flushed.
- The refrigerator was unplugged while making its water connection.
- Every accessible fitting has been checked for leakage.
- The refrigerator system was flushed according to its own manual.
- The line remains free after the refrigerator is moved into position.
Frequently Asked Questions
Can I run a refrigerator water line from under the kitchen sink?
Yes, an under-sink cold-water supply can be a practical source when a proper refrigerator shutoff connection is available. If you need to alter the household plumbing to create that connection, a qualified plumber is the safer option.
What size water line does a refrigerator use?
Many North American refrigerators use 1/4-inch / 6.35 mm outside-diameter tubing. Whirlpool currently specifies that size for the refrigerators covered by its general water-line guidance, and Samsung US also recommends a 1/4-inch installation kit. Check your model manual before purchasing parts.
Is copper or PEX better for a refrigerator water line?
Neither is universally better. Whirlpool permits soft copper or PEX on many refrigerators, while Samsung US recommends copper in its general guidance. Use the material approved for your exact refrigerator.
How much extra water line should I leave behind the refrigerator?
Leave enough to form a relaxed service loop so the refrigerator can be pulled forward without stressing or kinking the line. Whirlpool specifically recommends this arrangement.
Can I use a refrigerator before connecting the water line?
Many refrigerators can continue cooling without a water connection, but the ice maker should not be allowed to operate dry unless the manufacturer says otherwise. LG advises switching the ice maker off when operating the refrigerator before the water connection is installed.
Why is my refrigerator dispenser slow after installing the line?
Common external causes include a partially closed valve, kinked tubing, incorrect supply-valve arrangement, filter issues, or inadequate household pressure. Whirlpool identifies kinks and unsuitable valves as possible causes of restricted flow.
Do I need to flush a new refrigerator water line?
Yes, manufacturer instructions commonly require flushing. LG tells installers to flush the supply tubing until the water runs clear before connecting the refrigerator, followed by model-specific flushing through the dispenser.
Do I need a plumber to run a refrigerator water line?
Not necessarily when an appropriate shutoff valve already exists and you are only routing and connecting manufacturer-approved tubing. A plumber is recommended when the household supply needs modification, the route involves uncertain hidden utilities, or the manufacturer’s instructions or local rules require professional installation.

Daniel Brooks is a US-based appliance troubleshooting researcher with 12 years of experience studying washer, dryer, refrigerator, and dishwasher faults. He reviews manufacturer manuals and converts technical error codes into safe, practical guidance for homeowners.