
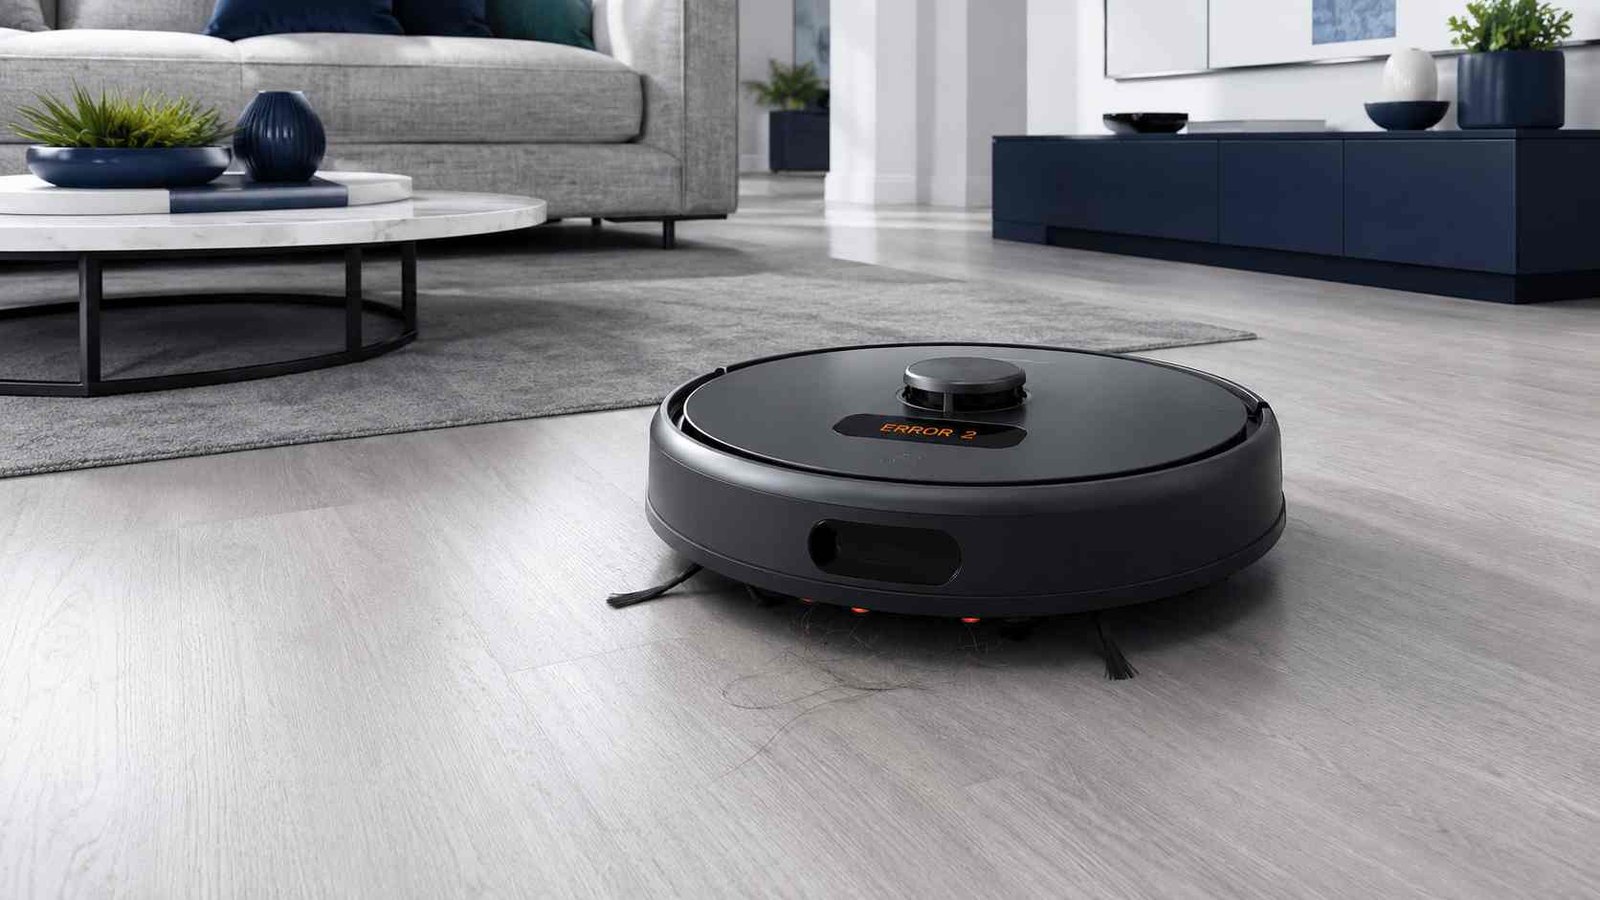
 Roomba Error 2 means the robot’s main cleaning brushes, rubber rollers, or debris extractors cannot turn correctly. Hair wrapped around the roller ends is the most common explanation, but debris beneath the removable end caps, an incorrectly fitted roller, thick carpet, or a worn brush can also trigger the error.
Remove the robot from its dock, turn it upside down on a stable surface, and inspect both main rollers. Clean the visible surfaces, roller ends, removable caps, metal axles, and the vacuum opening beneath them. Do not continue running the Roomba if you hear grinding, notice damaged parts, or smell overheating. Excessive hair buildup around the brushes can eventually damage the robot.
Roomba Error 2:
| Item | Details |
|---|---|
| Error code | Error 2 |
| Meaning | The main brush, extractors, or rubber rollers cannot turn |
| Appliance | Robot vacuum |
| Brand | iRobot Roomba |
| Most likely cause | Hair or debris around the rollers and end caps |
| Safe first check | Remove and thoroughly clean both main brushes |
| Repair difficulty | Usually easy routine maintenance |
| Can Roomba still be used? | Not until the rollers turn freely and the error clears |
| Professional help | Needed if the error remains after cleaning, testing, and replacing worn rollers |
Official iRobot guidance describes Error 2 as a stalled main-brush system. The exact wording may refer to brushes, extractors, multi-surface rubber brushes, or a main brush, depending on the Roomba series.
What Does Roomba Error 2 Mean?
Error 2 appears when the Roomba detects that its main floor-cleaning brush system is not rotating normally.
On older Roomba models, the message may say:
Error two. Open Roomba’s brush cage and clean brushes.
On newer models, the robot or app may report that the multi-surface rubber brushes cannot turn or instruct you to clear the brushes and press CLEAN.
This error normally concerns the rollers across the centre underside of the robot. It does not usually refer to the small edge-sweeping brush mounted near one side of the vacuum. iRobot provides separate maintenance and troubleshooting guidance for that side brush.
Error 2 Is Not the Same as Charging Error 2
The wording matters:
| Message | Affected system | Meaning |
|---|---|---|
| Error 2 | Main cleaning brushes | Brushes or rollers cannot turn |
| Charging Error 2 | Battery and charging system | A charging fault has been detected |
Charging Error 2 is not fixed by cleaning the rollers. It concerns a battery-charging fault and requires a different troubleshooting path.
Which Roomba Brushes Does Error 2 Refer To?
Roomba brush designs have changed over time, but they perform the same basic job: lifting dirt from the floor and moving it into the vacuum path.
| Roomba family | Main cleaning component |
|---|---|
| 400–700 Series | Traditional bristle and flexible brushes |
| 800–900 Series | Paired debris extractors |
| e and i Series | Dual multi-surface rubber brushes |
| j Series and Combo 10 Max | Dual multi-surface rubber brushes |
| s Series | Model-specific multi-surface rubber brushes |
| Roomba Essentials | Main bristle brush on applicable versions |
| Newer 100/1000 and 200/2000 families | Main brush system; check the model guide for its layout |
The release tabs, roller shapes, and end-cap designs differ. Identify the model or series before forcing any latch or removing a component. iRobot’s all-model maintenance guide separates instructions for traditional brushes, 800–900 extractors, rubber-brush models, s Series robots, and Roomba Essentials.
Common Causes of Roomba Error 2
1. Hair Wrapped Around the Rollers
Long hair, pet hair, thread, string, and carpet fibres can tighten around the rollers. The roller surfaces may look clean while material remains wound around the ends.
2. Debris Under the End Caps
This is one of the easiest areas to miss. Many Roomba rollers have removable end caps or extractor caps. Hair can collect underneath these caps and around the metal axles, creating enough resistance to stop the rollers. iRobot specifically instructs owners to remove and clean these areas.
3. Debris Inside the Roller
Hair or fine material may enter the hollow end of a roller. Inspect the inside openings after removing the caps.
4. A Blocked Vacuum Path
A compacted clump of dirt may sit beneath the rollers in the cleaning-head opening, also called the vacuum path or plenum. The opening should be checked while the rollers are removed.
5. Incorrectly Installed Rollers
Each roller has shaped ends that fit specific openings. A roller installed in the wrong position or not fully seated may bind when the cleaning-head door closes.
6. Worn or Distorted Brushes
A swollen end, damaged cap, split roller, bent brush, or worn bearing area may stop the assembly from rotating freely. iRobot advises replacing brushes or extractors when they do not rotate properly after cleaning.
7. Thick Carpet or a High-Pile Rug
Thick carpet can place extra resistance on the rollers. Official iRobot Error 2 guidance notes that high-pile rugs may slow the brush enough to trigger the error. A hard-floor test helps separate a floor-surface problem from a mechanical obstruction.
8. A Deeper Cleaning-Head Problem
When the rollers are clean, correctly installed, and able to rotate, the remaining fault may be within the cleaning-head mechanism. Internal motor, wiring, or control diagnosis is not a normal maintenance task and should be handled through iRobot support or a suitable robot-vacuum repair service.
How to Fix Roomba Error 2
Step 1: Stop the Cleaning Job
Pause the Roomba and remove it from the charging dock. Place it upside down on a flat, stable surface where it cannot roll or fall.
Remove loose cords, rug tassels, thread, and similar materials from the surrounding floor before testing it again.
Step 2: Open the Cleaning-Head Door
Locate the brush-frame or cleaning-head release tab.
Depending on the model, you may see:
- A green release tab
- Two yellow brush-guard tabs
- A model-specific extractor-frame latch
Lift or press the release gently. Do not force it if the mechanism does not match the instructions for your Roomba series.
Step 3: Remove Both Main Brushes
Lift out both rollers, extractors, or traditional brushes.
Keep track of their positions. The two rollers may look similar, but their peg shapes and mounting ends can differ.
Step 4: Remove Hair from the Roller Surfaces
Pull or cut away hair, thread, fibres, and string. Avoid damaging the rubber ridges or bristles while removing tightly wound material.
Some older bristle-brush models include a cleaning tool that slides over the brush to pull away hair.
Step 5: Clean the Roller Ends and End Caps
Remove each detachable end cap.
Check:
- The outer face of the cap
- The area underneath the cap
- The metal axle
- The roller opening
- The narrow space where hair winds around the shaft
This step often matters more than wiping the visible roller surface. iRobot specifically identifies debris around and beneath the caps as an area that requires routine cleaning.
Step 6: Check the Vacuum Path
Look into the opening beneath the removed rollers.
Remove accessible clumps of dust, pet hair, paper, fibres, and other loose debris. Do not push objects deeper into the cleaning head or dismantle its motor housing.
Step 7: Inspect the Rollers
Check both rollers for:
- Cracked or torn rubber
- Missing ridges
- Bent brush sections
- Damaged end caps
- Deformed mounting pegs
- Ends that feel unusually tight
- Material lodged inside the roller
A damaged roller may need replacement even when no visible hair remains.
Step 8: Reinstall the End Caps and Rollers
Fit each end cap securely.
Match the shape of each roller peg with the corresponding opening in the cleaning head. Seat both rollers fully before closing the brush frame. The frame should close without excessive pressure.
Step 9: Check That the Rollers Move
Turn the rollers gently to confirm that they are seated correctly and are not jammed.
Official maintenance guidance says the extractors should rotate freely. Brushes that remain stiff after cleaning may need replacement.
Step 10: Test Roomba on a Hard Floor
Place the robot on a clean hard surface and start a short cleaning job.
A hard-floor test is particularly useful when Error 2 occurs only on deep carpet. If the Roomba works on hard flooring but stops on one specific rug, the rug’s pile or loose fibres may be placing too much resistance on the brush.
What to Do When the Brushes Are Already Clean
A quick visual inspection is not always enough. Work through these checks before assuming the cleaning-head motor has failed.
Remove Every Detachable Cap
Hair underneath a cap may be nearly invisible until the cap is removed. Clean around both ends of both rollers.
Inspect Inside the Rollers
Look into each roller opening. A compacted ring of hair can sit just inside the end and restrict movement.
Confirm the Rollers Are in the Correct Positions
Match the shaped pegs carefully. Do not rely only on roller colour because replacement parts may look slightly different from the originals.
Test Without the Brushes on Supported Models
Official guidance for selected e and j-series Error 2 cases instructs owners to remove the multi-surface brushes, close the cleaning-head door, and use the result to help isolate whether the resistance comes from the brushes themselves. Follow the exact support instructions for your model before using this test.
Do not run a normal cleaning mission without the brushes. This is only a brief diagnostic check where the manufacturer provides that procedure.
Try the Original Rollers
When Error 2 begins immediately after fitting replacement brushes, reinstall the original rollers if they are still usable.
If the error disappears, check that the replacement set is intended for the exact Roomba model and that its end caps and peg shapes match the originals.
Replace Worn Brushes
iRobot recommends replacing main brushes every 6–12 months or as needed. Actual life depends on use, floor type, pets, and wear.
Use parts listed as compatible with the exact Roomba series. Similar-looking rollers are not necessarily interchangeable.
How to Reboot Roomba After Error 2
Clean and reinstall the brushes before rebooting. A reboot may clear an error retained in memory, but it cannot free a physically jammed roller.
Reboot Through the App
For many connected models, open the relevant iRobot or Roomba app and select the robot’s reboot option under its settings. The exact menu differs between the newer Roomba Home App and the classic iRobot Home App.
Manual Reboot
Button procedures vary by model:
| Model family | Official manual reboot method |
|---|---|
| i Series | Hold CLEAN for approximately 20 seconds |
| j Series and Combo 10 Max | Hold the button for approximately 9 seconds |
| Wi-Fi-connected 800 and 900 Series | Hold CLEAN for approximately 10 seconds |
| s Series | Hold CLEAN for approximately 20 seconds |
| Roomba Essentials | Hold HOME and SPOT for approximately 12 seconds |
| Non-Wi-Fi 500, 600, 700 and e Series | Hold HOME and SPOT for approximately 10 seconds |
Use the official model-specific reboot page when the controls on your robot do not match this table. Some 600 Series versions have a different procedure depending on a green identification dot beneath the bin.
A reboot is designed to refresh the robot without deleting maps, schedules, or preferences.
Do Not Start with a Factory Reset
A factory reset is not the normal solution for a jammed brush. It can remove account associations, preferences, maps, and other stored information. iRobot recommends trying a reboot before a factory reset and suggests contacting Customer Care before resetting when an error continues.
Possible Parts Involved
| Part | How it may contribute | Recommended action |
|---|---|---|
| Main bristle brush | Hair, bent bristles, damaged bearing | Clean or replace if worn |
| Rubber rollers or extractors | Debris under caps, deformation, worn ends | Clean caps and replace damaged rollers |
| End caps | Hair buildup or physical damage | Clean thoroughly or replace with compatible parts |
| Extractor or brush frame | Misalignment or damaged latch | Refit correctly; seek help if broken |
| Cleaning-head mechanism | Possible deeper drive fault | Contact iRobot or a repair service |
The cleaning-head mechanism should only be considered after accessible brushes, caps, and airflow areas have been checked. Avoid opening motor housings, testing live wiring, bypassing switches, or modifying the robot.
Can You Keep Using a Roomba with Error 2?
Do not repeatedly restart the robot while the brushes remain jammed.
The Roomba may stop itself again, clean poorly, make unusual noise, or place continued strain on the cleaning-head system. iRobot warns that excessive hair buildup in the brushes can permanently damage the robot.
Resume normal cleaning only when:
- Both rollers are clean
- End caps are clear
- The rollers are correctly installed
- The brush frame closes properly
- The rollers can turn
- Error 2 does not return during a short test
When to Contact iRobot or a Repair Service
Stop homeowner troubleshooting when:
- Error 2 returns immediately after complete cleaning
- The rollers remain stiff with all debris removed
- A roller, cap, frame, or mounting point is broken
- The robot makes loud grinding or clicking noises
- You notice heat, a burning smell, or melted material
- Error 2 remains during the manufacturer’s brush-isolation test
- More than one compatible roller set produces the same error
- The robot is covered by a warranty or service plan
- Internal disassembly would be required
Have the model and serial number available when contacting support. Regional customers may be directed to their local iRobot support or authorised parts provider.
How to Prevent Roomba Error 2
Clean the main brushes once per week. In homes with pets, iRobot recommends cleaning them twice per week.
During maintenance:
- Remove both rollers rather than cleaning them in place.
- Take off the end caps.
- Check the metal axles and roller interiors.
- Clear the vacuum opening.
- Inspect rollers for wear.
- Remove cords, thread, and loose rug tassels before a cleaning job.
- Check the brushes immediately after the robot runs through heavy pet hair or shredded material.
Replacing worn brushes before they become distorted can also reduce repeated stalls.
Frequently Asked Questions
What does Error 2 mean on a Roomba?
It means the main cleaning brushes, rubber rollers, extractors, or main brush cannot turn normally. Hair and debris around the roller ends are common causes.
Does Roomba Error 2 refer to the side brush?
Usually no. Error 2 relates to the main central brush system. The small edge-sweeping side brush has separate maintenance and fault guidance.
Why does Error 2 return when the rollers look clean?
Hair may be hidden underneath the end caps, around the metal axles, inside the rollers, or in the vacuum path. Remove the rollers and caps instead of checking only the visible surfaces.
Can thick carpet cause Roomba Error 2?
Yes. iRobot notes that thick carpet or high-pile rugs can slow the brushes enough to trigger Error 2. Test the robot on a clean hard floor to compare its behaviour.
Why did Error 2 start after installing new rollers?
The rollers may be incorrectly seated, incompatible, unusually tight, or defective. Confirm compatibility, match the shaped ends correctly, and compare them with the original rollers.
Will rebooting fix Roomba Error 2?
A reboot may clear a stored error after the physical obstruction has been removed. It will not fix a roller that remains jammed, damaged, or incorrectly installed. Reboot procedures vary by model.
Should I factory-reset my Roomba?
Not as an early Error 2 step. A factory reset can erase data and settings. Clean the brushes and perform a normal reboot first.
Is Charging Error 2 the same as brush Error 2?
No. Charging Error 2 is a battery-charging fault. Brush Error 2 means the main cleaning brushes cannot turn.

Emily Carter is an Australian home-appliance safety editor with 9 years of experience researching washers, air conditioners, refrigerators, and coffee machines. She checks troubleshooting steps for accuracy, regional model differences, and homeowner safety before publication.