
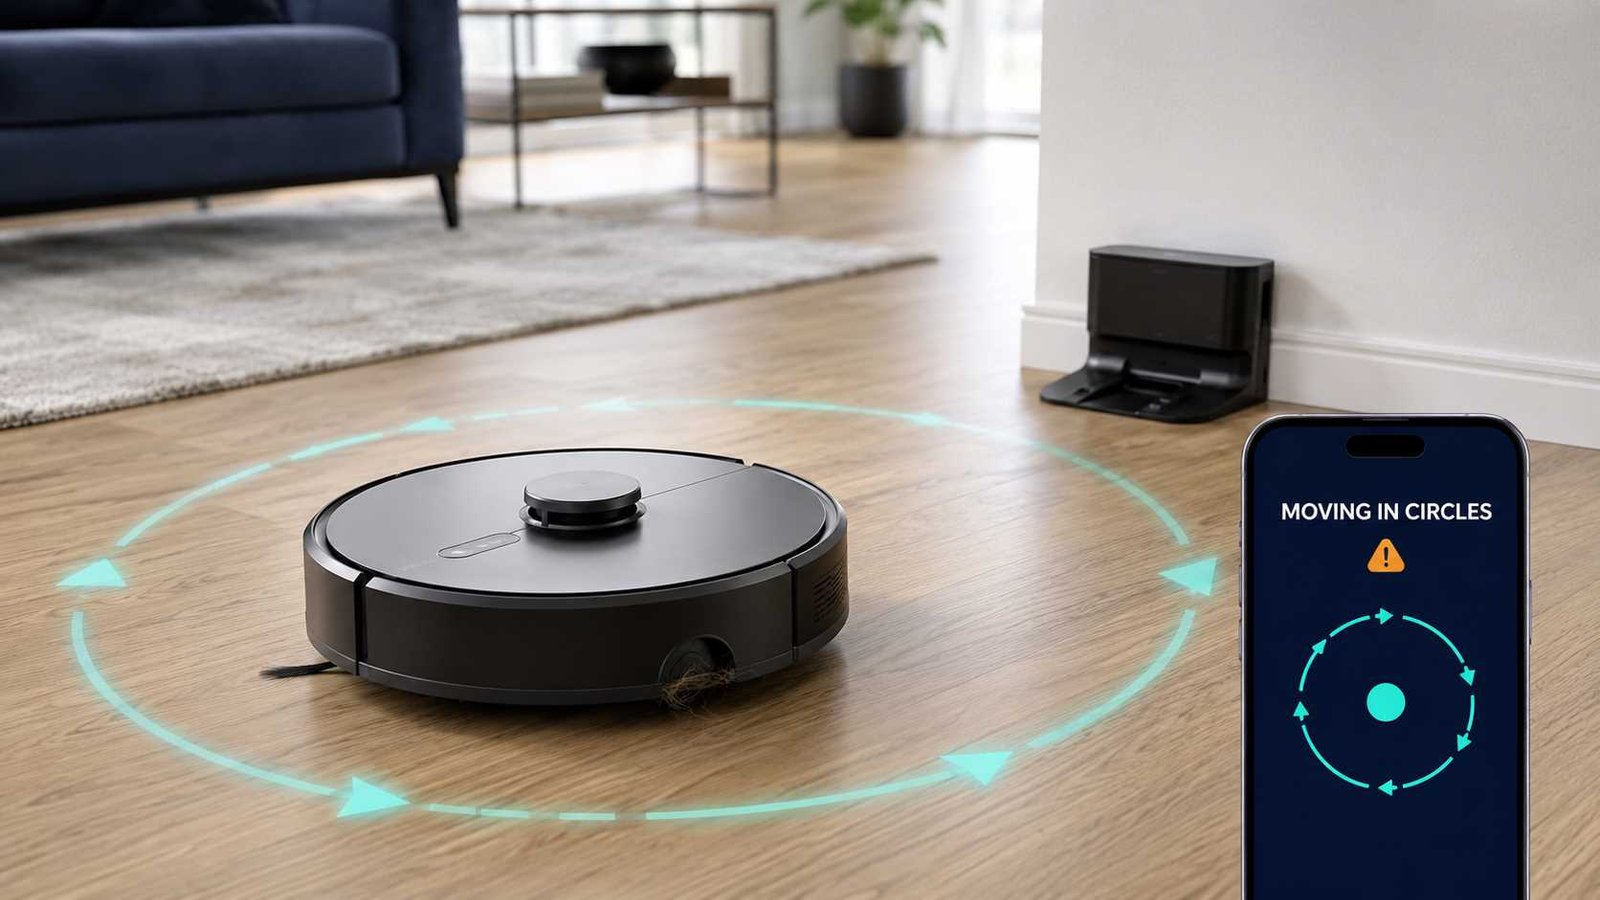
 A robot vacuum that moves in circles usually has a restricted drive wheel, dirty navigation sensor, stuck bumper, unsuitable floor surface, or temporary mapping problem. Start by moving the robot to a clear, level floor. Turn it off, remove hair and debris from both drive wheels, and check that each wheel moves and springs back evenly.
Brief circling is not always a fault. Some robots turn in place while locating themselves after leaving the dock, while selected Roomba models may clean repeatedly in a circular pattern when they detect concentrated dirt. The movement becomes abnormal when the robot continuously spins, always turns toward one side, cannot move forward, or repeats the behaviour throughout the cleaning cycle.
Stop using the robot until it has been checked if a wheel is locked, the unit makes grinding noises, it recently fell or became wet, or it may no longer detect stairs reliably.
| Item | Details |
|---|---|
| Problem | Robot vacuum repeatedly moves or spins in circles |
| Appliance | Robot vacuum or robot vacuum-and-mop |
| Brands affected | Potentially any brand; causes and error messages vary |
| Most likely cause | Hair, lint, or debris restricting one drive wheel |
| Other possible causes | Dirty sensors, stuck bumper, navigation obstruction, floor conditions, map problem, or software fault |
| Safe first check | Test on a clear floor, then power off and inspect both wheels |
| Repair difficulty | Usually easy when caused by visible dirt; moderate or professional when a wheel motor or navigation component has failed |
| Can it still be used? | Only when the circling is brief and confirmed as normal model behaviour |
| Professional help | Needed when a wheel stays stiff, the LiDAR does not rotate, unusual noises continue, or the fault returns after cleaning and restarting |
Is It Normal for a Robot Vacuum to Move in Circles?
Circular movement can be normal in a few specific situations. The duration and what happens next are important.
Normal spot-cleaning behaviour
Some robot vacuums use a circular or repeated back-and-forth pattern when concentrating on a dirty area. iRobot explains that a Roomba may repeatedly clean the same spot when it detects extra dirt. The robot should eventually leave that area and continue its cleaning route.
Positioning after leaving the dock
Certain mapped robots briefly rotate after leaving their base so they can identify their position and perform a self-check. Dreame states that short circling immediately after departure can be normal when the robot then continues cleaning correctly.
Temporary localisation during cleaning
A robot may occasionally circle a small area while updating its map or locating itself. ECOVACS notes that brief circling during localisation and mapping may be expected on some DEEBOT models.
Signs the movement is abnormal
Troubleshooting is needed when the robot:
- Continues spinning without moving forward
- Always turns clockwise or counterclockwise
- Repeats the same circle throughout the cleaning cycle
- Circles after every collision
- Cannot leave the charging station area
- Moves normally only when manually pushed
- Shows a wheel, bumper, cliff-sensor, or navigation error
- Makes clicking, scraping, or grinding sounds
- Began circling after a fall, liquid spill, or hard impact
What the Direction of the Circle Can Tell You
Robot vacuums normally steer by controlling their two main drive wheels independently. If one wheel moves more slowly than the other, the robot may curve toward the slower side.
| Movement pattern | Possible explanation | First area to check |
|---|---|---|
| Keeps turning left | Left wheel may be dragging, restricted, or moving more slowly | Left drive wheel and wheel well |
| Keeps turning right | Right wheel may be dragging, restricted, or moving more slowly | Right drive wheel and wheel well |
| Spins tightly in place | One wheel may not be driving, or the robot may be reacting to a sensor or bumper signal | Both wheels, bumper, and cliff sensors |
| Circles after hitting furniture | Bumper may not be returning to its normal position | Front bumper movement |
| Circles on one rug only | Traction, rug height, colour, or sensor response may be involved | Test on a plain hard floor |
| Circles near the dock | Robot may be positioning itself or receiving confusing navigation signals | Dock area, front sensors, and map |
| Repeats one small dirty area | May be normal focused cleaning | Observe whether normal cleaning resumes |
The direction is a clue, not a confirmed diagnosis. A dirty cliff sensor or stuck bumper can also make the robot turn repeatedly even when both wheels are mechanically sound.
Most Common Causes
1. Hair or debris around a drive wheel
Long hair, thread, lint, pet fur, and small floor debris can enter the gap around a drive wheel. One wheel may then rotate more slowly or fail to move through its full suspension travel.
Official iRobot and Roborock troubleshooting guidance recommends checking the side or drive wheels for obstructions, pressing them through their normal movement, and spinning them manually to see whether they are stuck.
2. Unequal wheel resistance
Both main wheels should usually feel reasonably similar when pressed and rotated by hand. One may have slightly different resistance depending on its design, but a wheel that is locked, unusually stiff, loose, or noisy deserves attention.
Persistent unequal movement after visible debris has been removed may indicate a problem inside the wheel assembly. Further diagnosis could involve the wheel motor, gearing, suspension mechanism, position feedback, or electrical connection. These are technician-level checks unless the manufacturer identifies the complete wheel assembly as user-replaceable.
3. Clogged front caster wheel
The small front caster supports the robot and changes direction as the robot steers. Hair wrapped around its axle can stop it from swivelling freely, making the robot drag, curve, or mark the floor.
iRobot recommends removing debris from the caster wheel, its housing, and the axle when rotation is restricted. Its maintenance guidance also warns that a caster clogged with hair and debris can damage flooring.
4. Dirty cliff or obstacle sensors
Cliff sensors help prevent the robot from driving over stairs or other drops. Obstacle and navigation sensors help it recognise walls, furniture, and open paths.
Dust, residue, or pet hair can make a sensor respond incorrectly. The robot may repeatedly turn because it believes there is a drop or obstacle in front of it. ECOVACS and Dreame both recommend cleaning accessible navigation and anti-drop sensors with a soft, dry material.
5. Stuck front bumper
The front bumper should move inward when pressed and return when released. Dirt in the bumper gap or damage from an impact can keep one side partly pressed.
A robot receiving a continuous collision signal may keep backing up, turning, or circling as it tries to escape an obstacle that is not actually there. Dreame includes the bumper or collision plate rebound check in its circling guidance.
6. Obstructed LiDAR system
Many mapped robots use a rotating laser distance sensor, commonly called LiDAR or LDS. Hair, dust, a trapped object, or a stuck sensor cover can interfere with rotation and positioning.
Roborock identifies a non-rotating laser unit as Error 1 on applicable models. Its official advice is to check whether the laser unit rotates and contact support if the error continues. Dreame also advises checking the LDS rotation, cover movement, and surrounding area on applicable models.
Do not remove the LiDAR assembly or open its motor housing unless the exact manufacturer instructions clearly permit it.
7. Unsuitable floor conditions
Robot vacuums may behave differently on:
- Very dark or black flooring
- High-contrast floor patterns
- Reflective surfaces
- Thick or uneven rugs
- Loose rug edges
- Wet or slippery floors
- Sudden transitions between floor heights
- Strong direct sunlight
Dreame identifies bright light and dark floors as possible contributors to circular movement on some models. ECOVACS also notes that high-pile carpet and slippery surfaces can interfere with travel.
8. Navigation or map problem
A mapped robot may become confused after:
- The dock has been moved
- Large furniture has changed position
- The robot was carried to another room
- A cleaning run was interrupted
- Doors were opened or closed during mapping
- The saved map became inaccurate
- The robot began from an unfamiliar location
Restarting the robot may allow it to reposition. Deleting the map should come later because it removes useful room divisions, restricted areas, and cleaning preferences on many models.
9. Software or firmware issue
A temporary software fault can affect communication between navigation and movement systems. Check the official app for updates and restart the robot using the instructions for the exact model.
Do not use an unrelated brand’s reset sequence. Reset buttons, button combinations, required charging levels, and the information erased by a factory reset vary between models. ECOVACS includes software and mapping issues among possible causes, while Dreame describes factory reset as a later step rather than the first response.
How to Fix a Robot Vacuum That Moves in Circles
Step 1: Observe the exact movement
Before switching the robot off, note:
- Which direction it turns
- Whether one wheel appears stationary
- Whether it circles only after leaving the dock
- Whether the problem occurs on every floor surface
- Any spoken alert, displayed code, flashing light, or app message
- Whether the robot eventually resumes normal cleaning
Record a short video if the problem is intermittent. This can help manufacturer support see the behaviour if the basic checks do not solve it.
Step 2: Test it in an open area
Place the robot on a clean, level, light-coloured hard floor with several feet of free space around it.
Remove:
- Cables
- Socks
- Toys
- Loose rug edges
- Lightweight curtains
- Reflective objects placed at floor level
- Water or cleaning-solution residue
Start a short cleaning cycle. If it now moves normally, the original floor surface or an obstacle may be causing the problem.
Step 3: Power the robot off
Stop the cleaning cycle and remove the robot from its charging dock.
Use the power switch or shutdown method described in the manual. Disconnecting the dock is also sensible before cleaning the charging or docking area.
Safety warning: Do not clean the underside while the robot is running. Do not open the battery compartment, wheel motors, internal wiring, LiDAR housing, or control board during basic troubleshooting.
Step 4: Inspect both drive wheels
Turn the robot over on a soft towel to avoid scratching its upper surface.
Check the left and right wheels for:
- Hair wrapped around the edges
- Thread or carpet fibres
- Small stones
- Sticky dirt
- Debris inside the wheel wells
- Visible cracking or damage
Remove only accessible material. Avoid forcing sharp tools deep into the wheel housing.
Step 5: Compare wheel movement
Press each drive wheel gently into its housing and release it. Both should move through their suspension travel and return.
Rotate each wheel by hand. Look for:
- One wheel that will not turn
- Major resistance on one side
- Grinding or clicking
- A wheel that remains pushed into the housing
- Excessive looseness
- Debris that appears only when the wheel is compressed
iRobot’s wheel-error guidance specifically recommends moving the wheels up and down and clearing loose material from the wheel wells. Roborock similarly recommends pressing and rotating the wheels when a drive-wheel error occurs.
Step 6: Clean the front caster wheel
Check whether the caster rolls and swivels freely.
On models designed for user removal:
- Remove the caster according to the manual.
- Clear debris from the wheel cavity.
- Remove hair from the axle.
- Spin the wheel by hand.
- Refit it securely.
Do not pull the caster out if the model’s instructions do not show it as removable.
Step 7: Clean accessible sensors
Use a clean, soft, dry microfibre cloth to wipe:
- Cliff sensors on the underside
- Front obstacle sensors
- Wall-following sensor
- Camera window
- LiDAR cover and optical openings
- Dock-location sensors
- Any other sensor identified in the manual
Do not spray water, glass cleaner, or household chemicals directly onto the robot.
Step 8: Check the bumper
Press the bumper gently at the centre and on both sides. It should move inward and return without sticking.
Inspect the narrow gap around it for dust or trapped debris. Do not lever the bumper away from the body.
Step 9: Check the navigation unit
For a LiDAR-equipped model, observe whether the laser turret rotates during startup. Also check whether its protective cover moves as intended.
For a camera-navigation model, clean the camera window and test the robot in suitable room lighting.
A robot without LiDAR does not need an LDS check. Identify the navigation system from the manual rather than assuming that every raised top section contains the same technology.
Step 10: Restart the robot
After cleaning:
- Return the robot to an open test area.
- Turn it on using the normal procedure.
- Allow it to complete its startup checks.
- Run a short cleaning cycle.
- Watch whether it can travel straight and turn in both directions.
A normal restart is preferable to a factory reset at this stage.
Check the App, Map, and Firmware
If the mechanical checks do not reveal a problem, open the manufacturer’s app.
Review error messages
Write down or screenshot any current or previous error. Error numbers do not have universal meanings.
For example:
- Selected Roomba models use Errors 7 or 10 for side-wheel problems.
- Roborock Error 7 concerns a stuck drive wheel on applicable models.
- Roborock Error 1 concerns the laser unit on applicable models.
These meanings must not be transferred to other brands or product families.
Check for updates
Install only official app and firmware updates. Keep the robot adequately charged and connected as directed by its manufacturer.
Restart before remapping
Try a normal restart before deleting the saved map. If the robot works mechanically but continues following an incorrect route, remapping may help.
Remap only when appropriate
Consider recreating the map when:
- Rooms or walls appear in the wrong location
- The robot continually positions itself in the wrong room
- The charging dock has permanently moved
- Navigation problems began immediately after a failed mapping run
- The manufacturer specifically recommends remapping
Remember that deleting a map may also remove room names, no-go zones, cleaning sequences, and other settings.
Treat factory reset as the last software step
A factory reset can erase maps, Wi-Fi details, schedules, and preferences. Use only the procedure published for the exact model and region.
What If the Robot Still Moves in Circles After Cleaning?
Persistent circling after the wheels, caster, sensors, bumper, floor, map, and software have been checked may indicate a component fault.
Possible areas include:
| Possible part | Signs that may point to it | Repair level |
|---|---|---|
| Drive-wheel assembly | One wheel remains stiff, silent, loose, or unable to turn | Model-dependent service |
| Wheel motor or internal gearing | Clicking, grinding, or one-sided drive loss | Professional diagnosis |
| Wheel-position feedback system | Wheel turns but robot cannot control direction accurately | Professional diagnosis |
| Front caster assembly | Caster remains restricted after cleaning | Often replaceable on selected models |
| Bumper mechanism or sensor | Robot reacts as though it is continuously hitting something | Model-dependent service |
| Cliff-sensor assembly | Robot constantly avoids an open, safe floor | Professional diagnosis |
| LiDAR motor or module | Turret does not rotate or navigation error continues | Professional service |
| Camera or navigation module | Robot cannot position itself despite clean optics and a valid map | Professional service |
| Main control electronics | Multiple unrelated movement faults remain | Professional diagnosis |
The presence of a symptom does not confirm that a listed part has failed. Proper testing may be required.
Can You Keep Using the Robot?
You can usually continue using it when:
- The circling lasts only a few seconds after leaving the dock
- It is performing a recognised spot-cleaning pattern
- It resumes normal cleaning without an error
- The manual confirms that the behaviour is expected
Stop the cleaning cycle when:
- It spins continuously
- One wheel is not turning
- The robot is scraping or marking the floor
- It behaves unpredictably near stairs
- The bumper remains stuck
- The LiDAR does not rotate
- There is a burning smell, unusual heat, liquid exposure, or electrical damage
- The robot recently fell from a height
Repeatedly running a robot with a locked wheel can worsen the mechanical problem and may damage flooring.
Brand and Model Differences
There is no universal diagnosis code or reset procedure for a robot vacuum that goes in circles.
Roomba: Selected models may report wheel-related Errors 7 or 10. Other Roomba models may briefly circle because concentrated dirt has activated focused cleaning.
Roborock: Error 7 relates to a stuck drive wheel on applicable models, while Error 1 relates to a non-rotating laser unit.
ECOVACS DEEBOT: Official guidance for abnormal circular routes includes checking the laser area, obstacles, and drive wheels. Brief circling may also occur during localisation on certain models.
Dreame: Guidance varies by model but commonly includes drive wheels, LDS movement, collision plate or bumper movement, sensor cleanliness, floor conditions, restart, and customer support when the fault continues.
Shark, Eufy, and other brands: Check the exact model manual and official support information. Do not assume that another manufacturer’s error number, reset sequence, or wheel-removal method applies.
When to Contact the Manufacturer or a Repair Service
Contact official support or an appropriate repair service when:
- One drive wheel stays locked after accessible debris is removed
- The wheel does not spring back
- A grinding or clicking sound continues
- The robot shows the same wheel or navigation error after restart
- The LiDAR turret does not rotate
- The bumper is physically damaged
- The robot recently fell, became wet, or suffered a hard impact
- The fault began during the warranty period
- The robot requires internal disassembly
- The manufacturer does not identify the suspected part as user-serviceable
Have the model number, serial number, error message, proof of purchase, and a short video ready before contacting support.
How to Prevent Circular Movement
Regular maintenance can reduce the chance of repeated navigation problems.
- Remove hair from the wheels and brushes regularly.
- Clean the caster and its axle when movement becomes restricted.
- Wipe accessible sensors with a dry microfibre cloth.
- Keep the front bumper gap free from debris.
- Pick up cables, socks, and small objects before cleaning.
- Keep the dock in a stable position with a clear approach route.
- Avoid leaving wet cleaning solution on the floor.
- Secure loose rugs and curled edges.
- Install official software updates.
- Do not carry a mapped robot between rooms during an active cleaning run unless its instructions allow it.
- Inspect the wheels after the robot becomes trapped on a threshold or thick rug.
Frequently Asked Questions
Why does my robot vacuum only turn left?
A robot that repeatedly turns left may have a restricted or slower left drive wheel. Power it off and compare both wheels for hair, debris, stiffness, and suspension movement. A stuck bumper or incorrect sensor reading can cause similar behaviour, so check those areas as well.
Why does my robot vacuum only turn right?
A continuous right turn often points to drag or reduced movement at the right drive wheel. Inspect the right wheel well first, but also clean the cliff sensors and check that the bumper returns normally.
Can dirty sensors make a robot vacuum spin in circles?
Yes. Dirt on cliff, obstacle, camera, or navigation sensors may cause the robot to respond to a drop or object that is not present. Clean only the accessible sensor surfaces using the method in the manual.
Why does my robot vacuum circle after leaving the dock?
A brief turn may be part of normal positioning and self-checking on some mapped models. It is more likely to be a fault when the robot never starts cleaning, repeatedly returns to the same circle, or displays an error.
Will resetting the robot fix circular movement?
A restart may clear a temporary navigation fault, but it will not remove hair from a wheel or free a stuck bumper. Perform the physical checks first. Use a factory reset only after consulting the exact model instructions because it may erase maps and settings.
Should I delete the robot vacuum’s map?
Delete and recreate the map only when the robot moves correctly but repeatedly misidentifies rooms or locations. First restart the robot, confirm the dock has not moved, and check for app or firmware updates.
Can a dark carpet make a robot vacuum move in circles?
It can on some models. Dark or strongly patterned flooring may affect optical or cliff-sensor readings, while thick carpet can reduce traction. Test the robot on a plain, level hard floor to see whether the behaviour changes.
How do I know whether a wheel motor has failed?
A possible motor or wheel-module fault may cause one wheel to remain stationary, turn intermittently, make unusual noises, or feel significantly different after visible obstructions have been removed. These symptoms are not conclusive, so manufacturer support or proper diagnosis may be required.

Emily Carter is an Australian home-appliance safety editor with 9 years of experience researching washers, air conditioners, refrigerators, and coffee machines. She checks troubleshooting steps for accuracy, regional model differences, and homeowner safety before publication.