
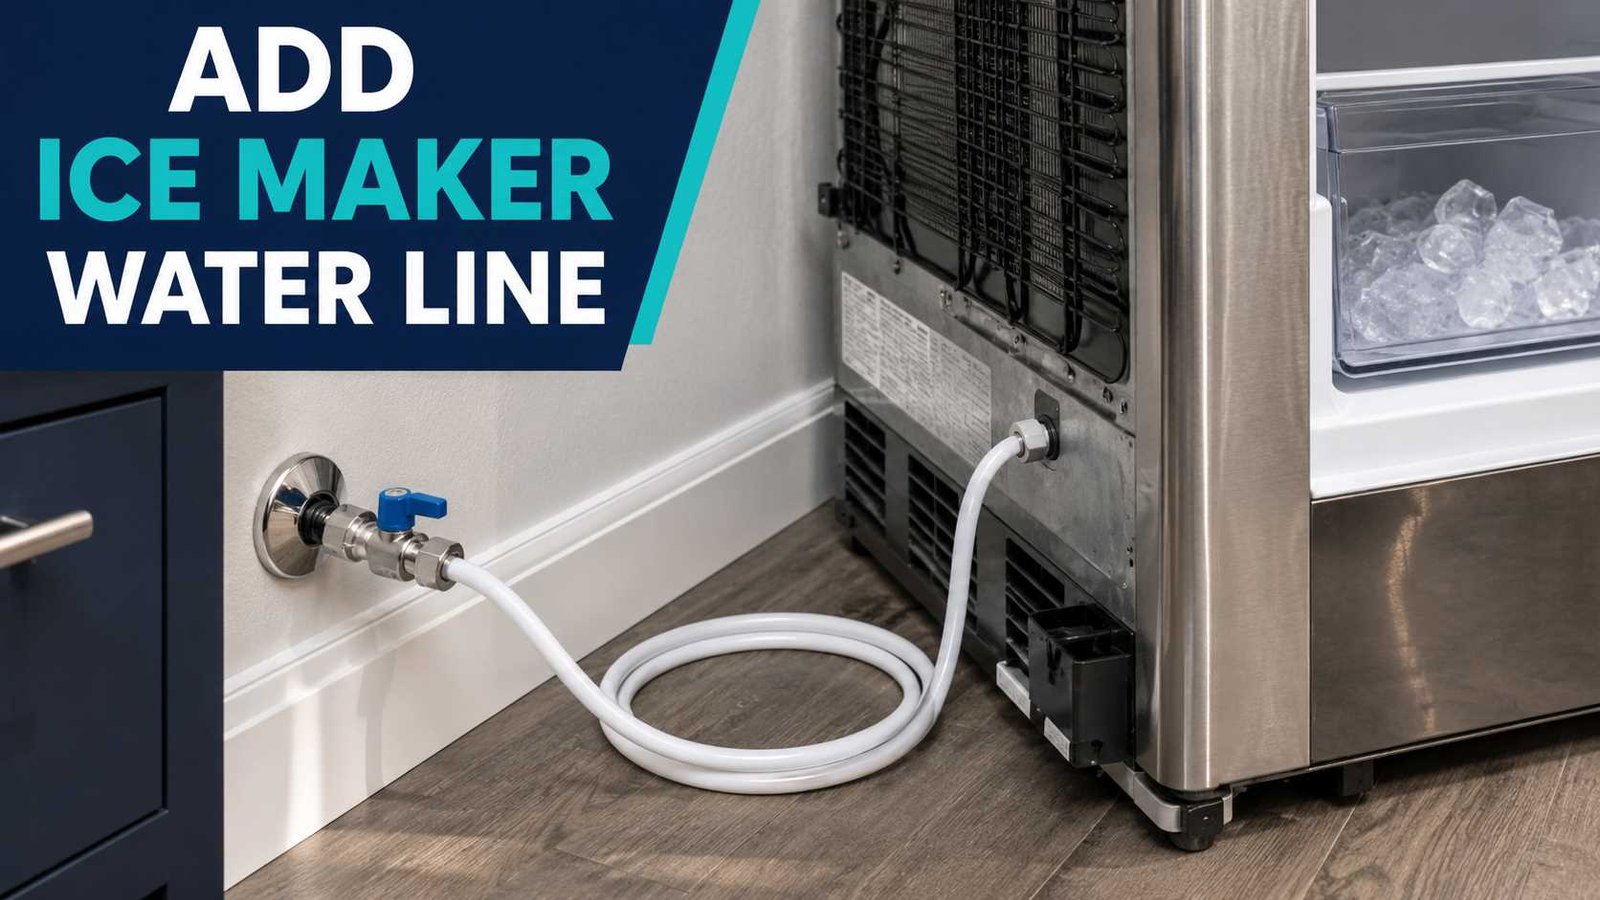
 If your refrigerator has an automatic ice maker but no water line connected, you normally need to run a cold potable-water supply to the refrigerator. On many North American refrigerators, this means a 1/4-inch water line running from an accessible shutoff valve to the water inlet at the back of the refrigerator.
The job is fairly simple when a refrigerator water valve already exists. If you need to cut into household plumbing, add a new branch, drill through a water pipe, or work inside walls, that becomes a plumbing job rather than a basic refrigerator hookup. LG specifically recommends contacting a qualified plumber when the household water supply must be modified.
Before buying tubing or fittings, check your refrigerator’s installation manual. Line type, water pressure and connection hardware can vary by model.
| Question | Practical answer |
|---|---|
| What water supply does an ice maker need? | Cold potable water |
| Common refrigerator line size | 1/4-inch outside diameter on many US models |
| Do I need a shutoff valve? | Yes, an accessible valve is strongly preferred and commonly specified |
| Can I use copper? | Yes on many models, but check the manual |
| Can I use PEX or approved plastic tubing? | Yes on some models |
| Should I connect to hot water? | No |
| Should I flush a new line? | Yes |
| Should extra tubing be left behind the fridge? | Yes, so the refrigerator can be moved without pulling the connection |
| Can I add the household plumbing connection myself? | Only where appropriate and permitted; call a plumber if the supply itself needs modification |
| What should I do after installation? | Turn on the water slowly and inspect every connection for leaks |
GE specifically states that current ice makers use a 1/4-inch connection on applicable models and should not be connected to a hot-water line.
Before You Add a Water Line, Check Your Refrigerator
Do not start by buying a generic ice-maker installation kit. Start with the refrigerator.
Does Your Ice Maker Actually Need Plumbing?
Most automatic ice makers in US and Canadian refrigerators need a direct water connection.
That is not true for every refrigerator worldwide.
Some UK-market refrigerators use an internal refillable tank instead of household plumbing. LG UK currently offers both plumbed and non-plumbed refrigerator models. In its non-plumbed designs, the user fills an internal tank that supplies the dispenser and, on applicable models, the ice maker.
If your refrigerator has a refillable reservoir, you may not need to add a household water line at all.
Find the Model Number and Manual
Look for the model label inside the refrigerator compartment, around the door frame, or in another location identified by the manufacturer.
Then check the installation section of the manual for:
- Required tubing diameter
- Approved tubing material
- Minimum and maximum water pressure
- Required fittings
- Water-filter requirements
- Valve requirements
- Flushing instructions
- Installer requirements in your country
This matters because a specification from one refrigerator should not automatically be applied to another.
Check the Required Water Pressure
Do not assume every ice maker uses the same pressure range.
For example, LG’s current US refrigerator connection guidance specifies 20 to 120 psi for the models covered by that support procedure.
Other models may have different limits, especially when filtration systems or pressure-control components are involved.
Use the value in your refrigerator manual.
What You Need
If an accessible refrigerator shutoff valve already exists, a basic installation may require:
- Refrigerator-approved water tubing
- Correct connector or adapter
- Compression nut and sleeve where specified
- Adjustable wrench
- Small bucket
- Dry towels
- Flashlight
- Refrigerator installation manual
Many North American refrigerators use 1/4-inch OD tubing.
Whirlpool’s current installation guidance uses 1/4-inch tubing for applicable refrigerators, while GE recommends its 1/4-inch cross-linked refrigerator tubing or 1/4-inch copper tubing for applicable models.
Do not assume those materials are correct for every refrigerator.
Where Should the Ice Maker Get Its Water?
The correct source is normally a cold potable-water supply.
There are several common situations.
Existing Refrigerator Water Valve
This is the easiest setup.
You may already have a small shutoff valve in the wall, cabinet, floor or nearby plumbing space. In that case, you usually only need to connect an approved refrigerator line between the valve and appliance.
Cold-Water Supply Near the Kitchen Sink
The refrigerator may be close enough to the sink for a properly designed refrigerator supply connection to originate there.
The line must still be routed safely so it is not:
- Crushed
- Kinked
- Exposed to heat
- Exposed to freezing
- Rubbed by cabinet edges
- Stretched when the refrigerator moves
If the sink plumbing does not already have a suitable appliance connection, have a qualified plumber determine the correct way to add one.
Basement or Crawl-Space Supply
In some homes, the refrigerator is located above an accessible cold-water pipe.
This can provide a convenient route, but creating the branch connection may involve drilling, cutting or altering household plumbing.
That work should comply with local plumbing rules.
No Existing Refrigerator Connection
If there is no suitable shutoff or appliance outlet, the safest approach is normally to have a plumber create one.
LG notes that household water-supply configurations vary and recommends a qualified plumber when the supply must be modified.
That gives you a proper valve that can be shut off quickly if the refrigerator line later leaks.
How to Add a Water Line for an Ice Maker
The following procedure assumes that a suitable cold-water shutoff connection already exists.
If it does not, have the household plumbing connection installed first.
Step 1: Turn Off the Ice Maker
If the refrigerator is already powered but does not yet have a water supply, switch the ice maker off.
Whirlpool and LG both warn against allowing the ice maker to operate before its water connection is installed.
Step 2: Turn Off the Water Supply
Close the refrigerator’s water shutoff valve before attaching the new tubing.
Place a towel beneath the valve in case a small amount of water remains in the fitting.
Step 3: Measure the Route
Measure from the water connection to the refrigerator inlet.
Do not make the line exactly that length.
The refrigerator must be able to move away from the wall for cleaning and servicing without pulling on the fitting.
GE recommends extra coiled tubing when copper is used, while manufacturer installation instructions commonly call for sufficient extra tubing to permit refrigerator movement.
Step 4: Connect the Tubing to the Water Supply
Connect the tubing according to the instructions for your shutoff valve and refrigerator line.
For a compression-type connection, this may involve:
- Sliding the compression nut onto the tubing.
- Positioning the required sleeve or ferrule.
- Fully inserting the tubing into the outlet.
- Tightening the fitting securely.
Do not assume every plastic, PEX, copper or braided line uses the same fitting system.
Follow the instructions supplied with the line and appliance.
Step 5: Flush the New Line
Before connecting the loose end to the refrigerator, place it inside a bucket or sink.
Slowly open the water valve.
Allow water to flow through the new tubing until it runs clear, then shut the valve again.
Whirlpool specifically includes flushing the tubing before final refrigerator connection, and LG gives the same basic instruction.
Flushing helps remove installation debris and trapped material before it reaches the refrigerator valve or filter.
Step 6: Unplug the Refrigerator
Disconnect refrigerator power before making the final connection at the appliance.
LG instructs users to unplug the refrigerator before connecting its water line.
Do not remove refrigerator electrical panels or work on internal wiring.
Step 7: Find the Refrigerator Water Inlet
The water inlet is commonly near the lower rear of the refrigerator, although its exact position varies by model.
GE confirms that the water valve location differs among refrigerator designs.
Use your refrigerator manual if the inlet is not obvious.
Step 8: Connect the Water Line to the Refrigerator
Remove any protective cap specified in the manual.
Attach the tubing using the manufacturer’s fitting arrangement.
For some compression connections, you will insert the tubing fully and tighten a compression nut. Other refrigerators may use a different connector.
Tighten the fitting securely, but do not simply keep tightening it in an attempt to prevent leaks. Whirlpool warns against overtightening its applicable refrigerator connection.
Step 9: Turn the Water On Slowly
Open the water shutoff.
Watch the supply fitting and refrigerator connection closely.
Use a dry tissue or paper towel around each joint. Even a small amount of moisture can reveal a slow leak that is difficult to see.
If a connection leaks, turn the water off before correcting it.
LG specifically instructs installers to check the completed connections for leakage.
Step 10: Create a Service Loop
Arrange the extra tubing loosely behind the refrigerator.
Do not make tight bends.
You want enough slack for the refrigerator to move forward without pulling on the valve or rear connection.
Keep the line away from:
- Sharp cabinet edges
- Heat sources
- Moving refrigerator parts
- Areas where the refrigerator wheels can roll over it
Step 11: Push the Refrigerator Back Carefully
Move the refrigerator slowly.
Stop if you feel resistance.
The water line should not become trapped between the appliance and wall or fold into a sharp kink.
A kink can restrict water flow even when the shutoff valve is completely open. LG identifies bent or kinked refrigerator water lines as a possible reason for poor dispenser or ice-maker water flow.
Step 12: Restore Power and Start the Ice Maker
Reconnect refrigerator power.
Turn the ice maker on according to your model instructions.
Do not expect immediate ice.
LG states that it may take up to 24 hours for ice production to begin on refrigerators covered by its current connection guidance.
Your model may specify a different initial waiting period.
Copper, PEX, Plastic or Braided Water Line?
There is no single correct answer for every refrigerator.
| Tubing type | Possible advantage | What to check |
|---|---|---|
| Soft copper | Long-used refrigerator supply material | Approved diameter and fittings |
| PEX/cross-linked plastic | Flexible and easier to route | Manufacturer approval |
| Refrigerator plastic tubing | Lightweight and flexible | Must be designed for potable refrigerator supply |
| Braided connector | Flexible, protected outer construction | Correct fittings and appliance compatibility |
GE currently recommends its 1/4-inch cross-linked plastic refrigerator line and also permits 1/4-inch copper for applicable installations.
Whirlpool documentation also varies by product and includes installations using copper or PEX household supply arrangements.
The important rule is simple:
Choose the tubing your refrigerator manufacturer approves for your model.
Should You Use a Saddle Valve?
Older refrigerator instructions and some ice-maker kits mention saddle valves.
That does not mean they are the right choice for every current installation.
Whirlpool’s more recent bottom-mount refrigerator documentation specifies a quarter-turn shutoff or equivalent and specifically says not to use a piercing-type or 3/16-inch saddle valve because it can restrict water flow and clog more easily.
Older LG documentation also warns that a saddle-type valve must comply with local plumbing codes.
If you need a new household shutoff installed, a proper accessible plumbing valve installed according to current local requirements is the better starting point.
What to Do After Connecting the Water Line
Do not consider the job finished the moment water reaches the refrigerator.
Flush the Refrigerator Water System
If your refrigerator has a dispenser, follow its model-specific flushing procedure.
For example, LG’s current connection guide instructs users of applicable refrigerators to dispense at least two gallons after installation.
The exact amount can vary by refrigerator and filter system.
Check Again for Slow Leaks
Inspect:
- Household shutoff valve
- Supply-line connection
- Refrigerator inlet
- Tubing along its route
- Floor beneath the refrigerator
Check again after the refrigerator has been moved into place.
A connection can appear dry initially but begin leaking after the tubing is repositioned.
Water Line Connected but Ice Maker Still Does Not Work
A new water connection does not automatically prove that water is reaching the ice maker.
Check the Shutoff Valve
Make sure the refrigerator water valve is completely open unless your manufacturer specifies otherwise.
Look for a Kink
Pull the refrigerator forward carefully and inspect the line.
A kink behind the appliance can reduce flow enough to affect ice production.
Confirm Water Pressure
Compare household pressure with the range specified in your refrigerator manual.
Do not use another refrigerator’s pressure specification as your reference.
Check the Ice Maker Setting
Make sure the ice maker is switched on.
Some refrigerators also have control-panel settings that can disable ice production.
Give the Refrigerator Time
A newly installed refrigerator must cool before normal ice production can begin.
On applicable LG refrigerators, the first ice may take up to 24 hours.
Check the Water Filter
An incorrectly installed, restricted or overdue filter can reduce water flow on refrigerators equipped with filtration.
If your refrigerator dispenses water slowly as well as making little ice, the supply valve, line and filter are sensible places to check first.
Stop if Water Is Leaking
A leaking fitting is not something to ignore while waiting for the ice maker to start.
Turn off the refrigerator water supply and correct the leak before normal use.
LG notes that leaks from the rear or bottom of a refrigerator can result from a damaged or improperly connected water line.
When to Call a Plumber
Contact a qualified plumber when:
- No refrigerator water connection exists
- A household water pipe must be cut or drilled
- Plumbing is concealed inside a wall or floor
- You cannot identify a suitable cold-water supply
- The shutoff valve is corroded or leaking
- Local rules require professional installation
- Water pressure falls outside the refrigerator specification
- You have recurring leaks
- You are unsure which fittings are permitted
This distinction is especially important outside North America.
For example, current Fisher & Paykel documentation for selected refrigerators sold in Australia, New Zealand and other regions states that the ice-and-water connection must be installed by a qualified plumber or approved service technician and must comply with relevant plumbing requirements.
Regional and Model Differences
United States and Canada
A 1/4-inch refrigerator supply line is very common, but approved material and water-pressure requirements still depend on the appliance.
United Kingdom and Ireland
Check whether the refrigerator is plumbed or non-plumbed before planning any installation.
Some refrigerators with ice and water dispensers operate from a refillable internal tank.
Australia and New Zealand
Do not automatically follow a US refrigerator installation video.
Certain models have specific water kits, pressure-control arrangements and professional-installation requirements. Fisher & Paykel’s current regional documentation is one example.
Safety Warnings
Stop and get professional help if the job requires work beyond a normal appliance water-line connection.
In particular:
- Do not drill blindly through walls, cabinets or floors where electrical cables, gas lines or pipes may be hidden.
- Do not work on refrigerator wiring.
- Unplug the refrigerator before making the appliance-side water connection when instructed by the manufacturer.
- Use potable-water-rated tubing and fittings.
- Do not connect the ice maker to hot water.
- Keep water tubing away from freezing conditions.
- Never leave a leaking connection under pressure.
- Follow local plumbing rules.
- Follow the refrigerator manual when it conflicts with generic instructions.
Frequently Asked Questions
What size water line is normally used for an ice maker?
Many US refrigerators use 1/4-inch outside-diameter tubing. Whirlpool and GE both specify this size for applicable refrigerators.
Always confirm the size in your model’s installation manual.
Can I install an ice maker water line myself?
If a suitable shutoff valve already exists, connecting approved tubing to the refrigerator may be a reasonable homeowner task.
If you need to modify household plumbing, LG recommends contacting a qualified plumber. Some manufacturers and regions expressly require professional water connections.
Can I connect the refrigerator water line under the sink?
Potentially, if there is an appropriate cold potable-water connection and the installation complies with local plumbing requirements.
Do not improvise a connection onto unsuitable plumbing.
Does the ice maker use hot or cold water?
Cold water.
GE specifically says not to connect an ice maker to a hot-water supply.
Can I use PEX for a refrigerator water line?
PEX or cross-linked plastic is approved for some refrigerators and installation arrangements. GE sells a universal cross-linked refrigerator supply line, while Whirlpool documentation for selected refrigerators also references PEX household supplies.
Check the manual before choosing the material.
Why isn’t my ice maker making ice after I installed the water line?
Common possibilities include:
- Closed water valve
- Kinked line
- Air in a new line
- Low water pressure
- Ice maker switched off
- Refrigerator not yet cold enough
- Restricted water filter
- Incorrect connection
A newly connected ice maker may also need time before producing its first batch.
How much extra water line should I leave behind the refrigerator?
Leave enough tubing for the refrigerator to be pulled forward for cleaning and servicing without stretching the line.
Some manufacturer instructions give specific extra lengths for particular tubing arrangements, but the required amount varies by installation. GE, for example, describes additional coiled copper tubing for refrigerator movement.
Should I throw away the first ice after installing a new water line?
Follow your refrigerator manual.
Manufacturers may tell users to flush a specified amount of water and discard initial ice after a new line, filter or refrigerator installation. The exact amount varies by model and filtration system.

Daniel Brooks is a US-based appliance troubleshooting researcher with 12 years of experience studying washer, dryer, refrigerator, and dishwasher faults. He reviews manufacturer manuals and converts technical error codes into safe, practical guidance for homeowners.