
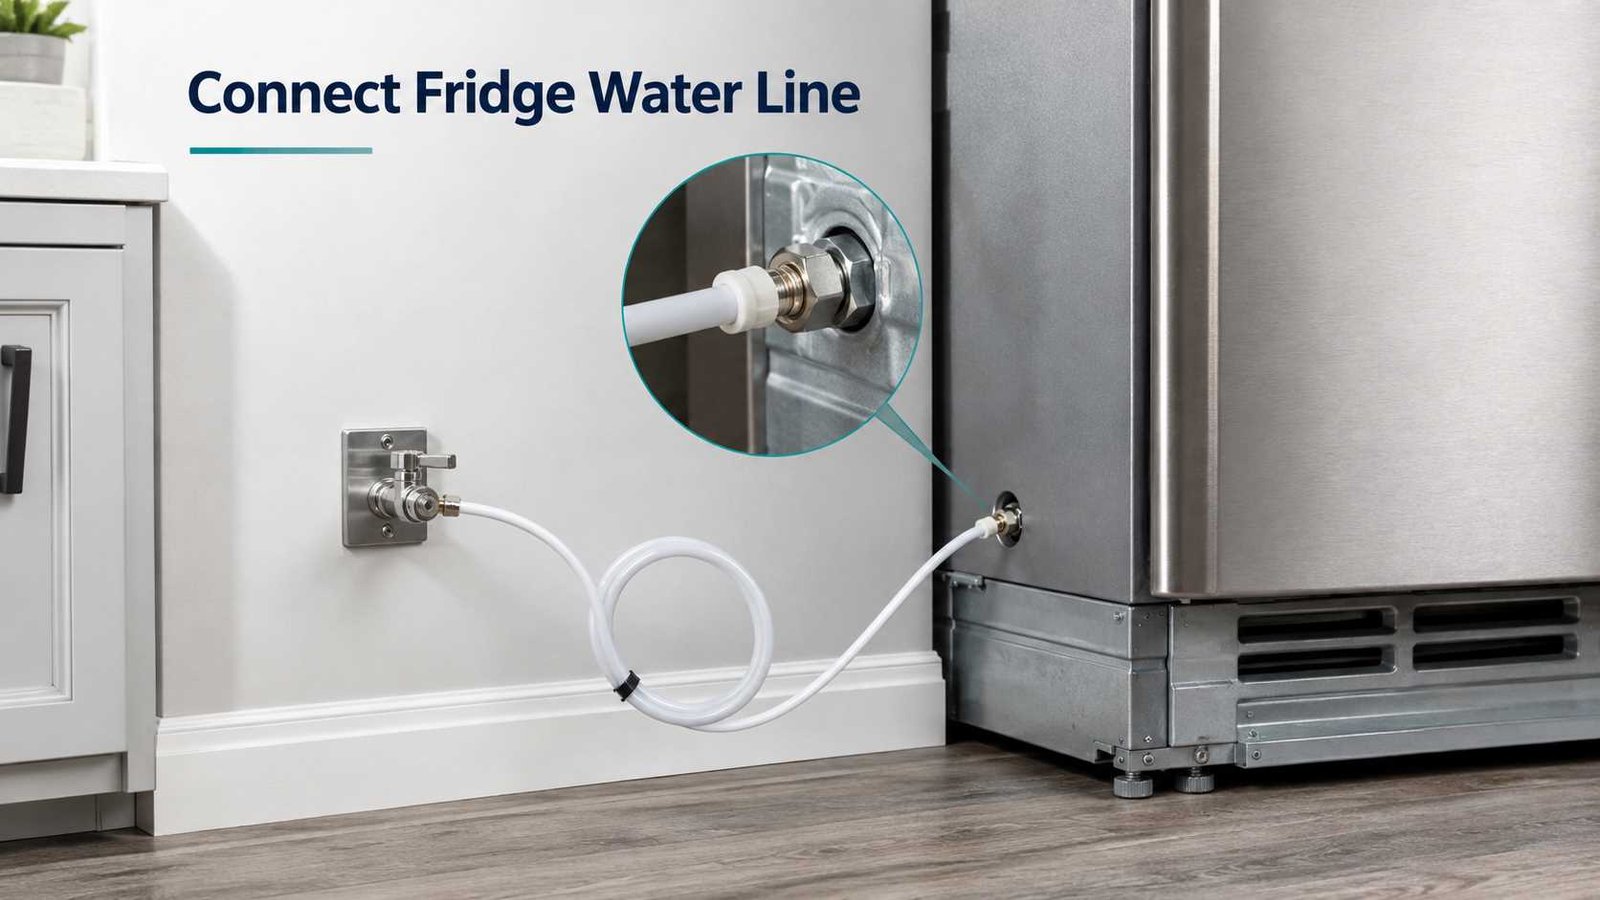
 Connecting a fridge water line is usually straightforward when your kitchen already has a suitable cold-water shutoff valve near the refrigerator. In many North American installations, the refrigerator connects with 1/4-inch outside-diameter tubing, although the correct tubing, fittings, water pressure, and connection method can vary by model. Whirlpool, LG, and Samsung all recommend checking the refrigerator’s installation instructions before making the connection.
Before starting, shut off the water supply and unplug the refrigerator if the manufacturer’s instructions require it. If installing the line means cutting into household plumbing, drilling through pipes, or replacing a damaged shutoff valve, use a qualified plumber rather than treating that work as a basic refrigerator hookup.
| Item | What You Need to Know |
|---|---|
| Water source | Cold potable water |
| Common North American line size | 1/4-inch OD |
| Common tubing | Soft copper or PEX on many models |
| Shutoff valve | Should be accessible and suitable for the installation |
| Basic difficulty | Easy to moderate if a proper valve already exists |
| First safety step | Shut off water and follow the refrigerator manual |
| After connection | Flush the line and inspect every joint for leaks |
| Call a professional when | Household plumbing must be altered, pressure is unsuitable, or leaks persist |
Whirlpool specifies 1/4-inch OD soft copper or PEX for refrigerators covered by its general support guidance, while LG also refers to a standard 1/4-inch water line in its US installation instructions. Exact requirements should still be verified for your model.
Do I Need to Connect My Fridge to a Water Line?
Not every refrigerator needs a household water connection.
A plumbed refrigerator normally needs a water line if you want to use an automatic ice maker, water dispenser, or both. LG states that a connection between the refrigerator and the home’s water supply is required for these functions on applicable models.
However, some refrigerators are specifically designed as non-plumbed models. They use a refillable internal water tank instead of a permanent household water connection. Samsung Australia, for example, documents refrigerators that produce chilled water and ice from an internal tank.
If your refrigerator has an ice maker but you are not connecting water yet, check the owner’s manual. LG advises switching the ice maker off on applicable models when operating the refrigerator before the water connection has been installed.
What You Need Before Connecting the Water Line
Before pulling the refrigerator away from the wall, check the installation manual and identify the water inlet.
A typical installation may require:
- Refrigerator-compatible water tubing
- Compression nuts or another manufacturer-approved connector
- Ferrule, sometimes called an olive in some regions
- An accessible cold-water shutoff valve
- Adjustable wrench
- Container or bucket for flushing the line
- Towels for checking small leaks
Samsung notes that water-line kits are often sold separately and that their contents can vary. Its US instructions describe kits containing 1/4-inch tubing, compression nuts, and a ferrule for applicable installations.
Do not assume a fitting from an old refrigerator automatically matches the new appliance.
What Size Water Line Does a Refrigerator Use?
1/4-inch outside-diameter tubing is very common in the United States and Canada, but it should not be treated as a universal specification.
Whirlpool specifies 1/4-inch or 6.35 mm OD soft copper or PEX for models covered by its guidance. LG US also instructs users to connect a standard 1/4-inch water line on applicable refrigerators. Samsung’s US installation guidance similarly describes 1/4-inch tubing and fittings.
Refrigerators sold in other markets or certain model families may use different connectors or factory-installed tubing.
Check the model manual before buying a kit.
Copper, PEX, or Plastic Refrigerator Water Line?
There is no single tubing material that can safely be recommended for every refrigerator.
| Tubing | Manufacturer Guidance | Main Consideration |
|---|---|---|
| Soft copper | Commonly specified | Must be routed without kinking |
| PEX | Accepted on many Whirlpool installations | Needs compatible fittings |
| Plastic tubing | Used on some systems | Connection design is model-specific |
| Flexible supply assembly | May be available for selected models | Verify model compatibility |
Whirlpool lists soft copper and PEX in its general refrigerator guidance. Samsung provides instructions for both copper and plastic connections on some models but says plastic tubing kits are not recommended in the US guidance referenced here.
The correct choice is therefore the material approved in your refrigerator’s installation instructions.
How to Connect a Fridge Water Line to an Existing Valve
These steps apply when a suitable cold-water valve is already installed. They are a general guide, not a replacement for model-specific installation instructions.
1. Check the Refrigerator Manual
Find the installation section for:
- Required tubing diameter
- Fitting type
- Water pressure
- Water inlet location
- Flushing procedure
- Any special filter requirements
Manufacturers repeatedly note that installation requirements vary by refrigerator.
2. Shut Off the Water Supply
Close the refrigerator’s dedicated water shutoff valve before disconnecting or attaching tubing.
If the instructions tell you to disconnect electrical power, unplug the refrigerator as well. Whirlpool and LG both include power-disconnection precautions in their installation guidance.
3. Inspect the Existing Valve and Line
Look for:
- Corrosion
- Cracked tubing
- Damaged threads
- Mineral buildup
- Kinks
- Previous leakage
Do not reuse badly damaged tubing simply because it fits.
Whirlpool identifies cracks, leaks, clogs, and kinks as common refrigerator water-supply problems.
4. Route the New Water Line
Run the tubing from the shutoff valve toward the refrigerator without sharp bends.
Leave enough extra length behind the refrigerator to pull the appliance forward for cleaning or service. Whirlpool specifically recommends leaving a service loop and warns that pushing the refrigerator too far back can pinch the line and reduce water flow.
5. Connect the Line to the Shutoff Valve
The exact method depends on the valve and tubing.
For a typical compression connection, the tubing must be squarely seated and the correct nut and ferrule fitted according to the kit or appliance instructions.
Do not force mismatched threads or improvise adapters.
6. Flush the Supply Line
Before connecting the free end to the refrigerator, place it into a bucket or sink.
Open the supply valve and let water run until it appears clear. Then close the valve again.
Both Whirlpool and LG recommend flushing newly installed tubing before completing the refrigerator connection.
7. Connect the Line to the Refrigerator
Locate the refrigerator water inlet, usually toward the rear of the appliance.
Install the required nut, ferrule, molded end, adapter, or other fitting exactly as your model instructions specify.
Seat the tubing fully and tighten the fitting securely without excessive force. Samsung warns that overtightening a compression connection can itself cause leakage.
8. Turn the Water Back On
Open the water valve carefully.
Watch the supply-valve connection and the refrigerator connection as pressure returns to the line.
9. Check for Leaks
Use a dry paper towel or cloth around each accessible connection. Even a small amount of moisture can reveal a slow leak.
Samsung, LG, and Whirlpool all instruct users to inspect connections for leakage after turning the water back on.
If a connection continues leaking after correct assembly, shut off the water rather than repeatedly overtightening the fitting.
10. Move the Refrigerator Back Carefully
Guide the refrigerator into position while watching the tubing.
The line should form a relaxed service loop rather than being crushed between the appliance and wall.
After moving the refrigerator, inspect the connections again.
How Do I Install a Refrigerator Water Line Kit?
A refrigerator water line kit normally provides some combination of tubing, compression fittings, ferrules, connectors, or adapters.
However, kit contents are not standardized.
Samsung specifically notes that some kits may not include every compression nut required. Whirlpool also sells refrigerator water-line kits with 1/4-inch fittings for selected appliances.
Before installation:
- Check the refrigerator manual.
- Confirm the tubing diameter.
- Confirm the valve connection.
- Check whether a ferrule or molded tubing end is required.
- Make sure the tubing is approved for potable water.
- Verify that every fitting matches the tubing material.
If the kit requires you to modify the home’s plumbing rather than simply connect to an existing outlet, that becomes a plumbing installation rather than just a refrigerator hookup.
How to Connect Two Fridge Water Lines Together
Two refrigerator water lines can sometimes be joined using a compatible union or coupler, but the connector must match the tubing diameter and material.
Do not simply push two pieces of tubing together or use an improvised household connector.
A proper connection generally requires:
- Shut off the water.
- Cut away any damaged tubing.
- Make sure both tube ends are clean and square.
- Use a potable-water-rated union designed for that tubing.
- Insert or assemble both lines according to the fitting instructions.
- Restore water pressure.
- Inspect the joint carefully for leakage.
Whenever possible, replacing a short, damaged supply line with one continuous correctly sized line can remove an unnecessary leak point.
There is another important distinction: some refrigerators themselves have more than one water line.
Samsung states that certain RS27T and RS22T refrigerators have two lines and warns that cross-connecting them can prevent the ice and water dispensing systems from operating correctly. Always follow the model diagram rather than assuming two visible refrigerator tubes should simply be joined together.
How Much Water Should You Flush After Installation?
There is no universal flushing amount.
LG US tells users of applicable models to dispense at least 2 gallons after installation. Samsung US tells users covered by its instructions to dispense 1 gallon before drinking the water. The difference illustrates why the manual for your exact refrigerator should control the procedure.
Flushing helps remove trapped air and material left in the new line.
You may initially hear sputtering or see an uneven water stream while air leaves the system.
Refrigerator Water Pressure Requirements Vary
Do not use one pressure specification for every refrigerator.
For example:
| Manufacturer Guidance Example | Pressure |
|---|---|
| LG US applicable models | 20–120 psi |
| Whirlpool general guidance | 30–120 psi |
| GE refrigerator without filter | 20–120 psi |
| GE refrigerator with filter | 40–120 psi |
| Samsung US ice-maker guidance | Minimum 30 psi |
These are manufacturer examples, not universal specifications.
Low pressure can contribute to slow dispensing and poor ice production. Excessive or otherwise unsuitable pressure also requires attention.
Check the installation manual or ask a qualified plumber to measure the home’s water pressure if necessary.
What If There Is No Refrigerator Water Shutoff Valve?
This is where the job becomes more complicated.
If an accessible refrigerator water outlet already exists, connecting the appliance may be a reasonable homeowner task.
If you must:
- Cut into a household pipe
- Replace an old plumbing valve
- Drill through water pipe
- Route tubing through walls or floors
- Identify unfamiliar pipe material
- Correct a pressure problem
consider using a qualified plumber.
LG specifically recommends professional plumbing help when the household water supply must be modified. Whirlpool also notes that long or complicated routing may justify professional installation and that plumbing must comply with applicable codes.
A Note About Saddle and Piercing Valves
Do not assume every refrigerator manufacturer gives the same advice about these valves.
Whirlpool’s current support guidance warns against piercing-type or undersized saddle valves because they can restrict water flow and advises checking whether such installations comply with local plumbing codes.
Follow the requirements for your refrigerator and local plumbing rules rather than copying a generic installation found online.
Water or Ice Not Working After Connecting the Line
If the connection looks dry but the dispenser or ice maker does not work, start with simple checks.
Check the Shutoff Valve
Make sure the refrigerator water valve is fully open.
Look for a Kinked Line
A tube trapped behind the refrigerator can restrict water flow. Whirlpool specifically identifies kinking as a cause of reduced flow and pressure.
Flush Air From the System
New lines frequently contain air. Follow the model’s dispensing procedure until flow stabilizes.
Check the Water Filter
Make sure the filter is installed correctly if your refrigerator requires one.
Verify Water Pressure
Low pressure can reduce dispenser flow or prevent the ice maker from filling correctly. Manufacturer requirements differ, so check the model documentation rather than assuming a universal pressure.
Check Model-Specific Water Connections
If the refrigerator has multiple tubing connections, verify them against the installation diagram. Selected Samsung models, for example, can malfunction if two water lines are cross-connected.
When to Call a Plumber or Appliance Technician
Stop DIY work and get professional help when:
- The household shutoff valve leaks
- Plumbing has to be cut or substantially modified
- The existing pipe material is unfamiliar
- Water pressure is outside the refrigerator’s required range
- A connection leaks despite correct assembly
- Tubing disappears into a wall and appears damaged
- Water is leaking from inside the refrigerator rather than an accessible external connection
- The manufacturer requires professional installation
- The dispenser remains inoperative despite correct water supply, filter, and pressure
A plumber is generally the right person for household supply and valve problems. An appliance service technician is more appropriate when the water reaches the refrigerator correctly but an internal refrigerator component appears faulty.
Fridge Water Line Safety Checklist
- Read the installation instructions for the exact refrigerator model.
- Use cold potable water only.
- Shut off the water before opening a connection.
- Disconnect refrigerator power when instructed by the manufacturer.
- Use tubing and fittings approved for the appliance.
- Do not overtighten compression fittings.
- Keep the tubing away from freezing conditions where required.
- Leave enough tubing for a service loop.
- Prevent kinks and pinching behind the refrigerator.
- Flush the new line according to the model instructions.
- Inspect every accessible joint for leaks.
- Recheck the line after moving the refrigerator into position.
Frequently Asked Questions
How do I connect a water line to a fridge?
If a suitable cold-water shutoff valve already exists, shut off the supply, route the manufacturer-approved tubing to the refrigerator, flush the line, connect it to the fridge inlet using the specified fitting, reopen the valve, and check carefully for leaks.
Do I need to connect my fridge to a water line?
Only if the appliance’s features require a plumbed supply. Automatic ice makers and plumbed water dispensers normally require it, but some refrigerators use refillable internal tanks instead.
Can I use my refrigerator without connecting the water line?
Usually the refrigeration compartments can still operate, but water and automatic ice functions that depend on plumbing will not. Check whether the ice maker should be switched off until water is connected.
What size water line goes to a refrigerator?
Many refrigerators sold in North America use 1/4-inch OD tubing. Whirlpool, LG, and Samsung all reference 1/4-inch connections in current guidance for applicable models. Confirm your model before purchasing tubing.
How do you connect two fridge water lines together?
Use a potable-water-rated union or coupler designed for the exact tubing material and diameter. Shut off the supply first and leak-test the connection afterward. Do not confuse an extension joint with models that have two separate functional refrigerator lines.
Is it easy to install a refrigerator water line?
It can be relatively simple when an accessible, compatible shutoff valve is already installed. The difficulty rises sharply if the water supply must be altered, routed through walls, or repaired. Whirlpool and LG recommend professional help for more complicated plumbing situations.
Why is my refrigerator water line leaking after installation?
Common causes include a fitting that is incorrectly assembled, damaged tubing, a connection that is not fully seated, or excessive tightening. Shut off the water before correcting the connection. Whirlpool recommends checking both the supply-valve and refrigerator-side connections when investigating leaks.

Daniel Brooks is a US-based appliance troubleshooting researcher with 12 years of experience studying washer, dryer, refrigerator, and dishwasher faults. He reviews manufacturer manuals and converts technical error codes into safe, practical guidance for homeowners.