
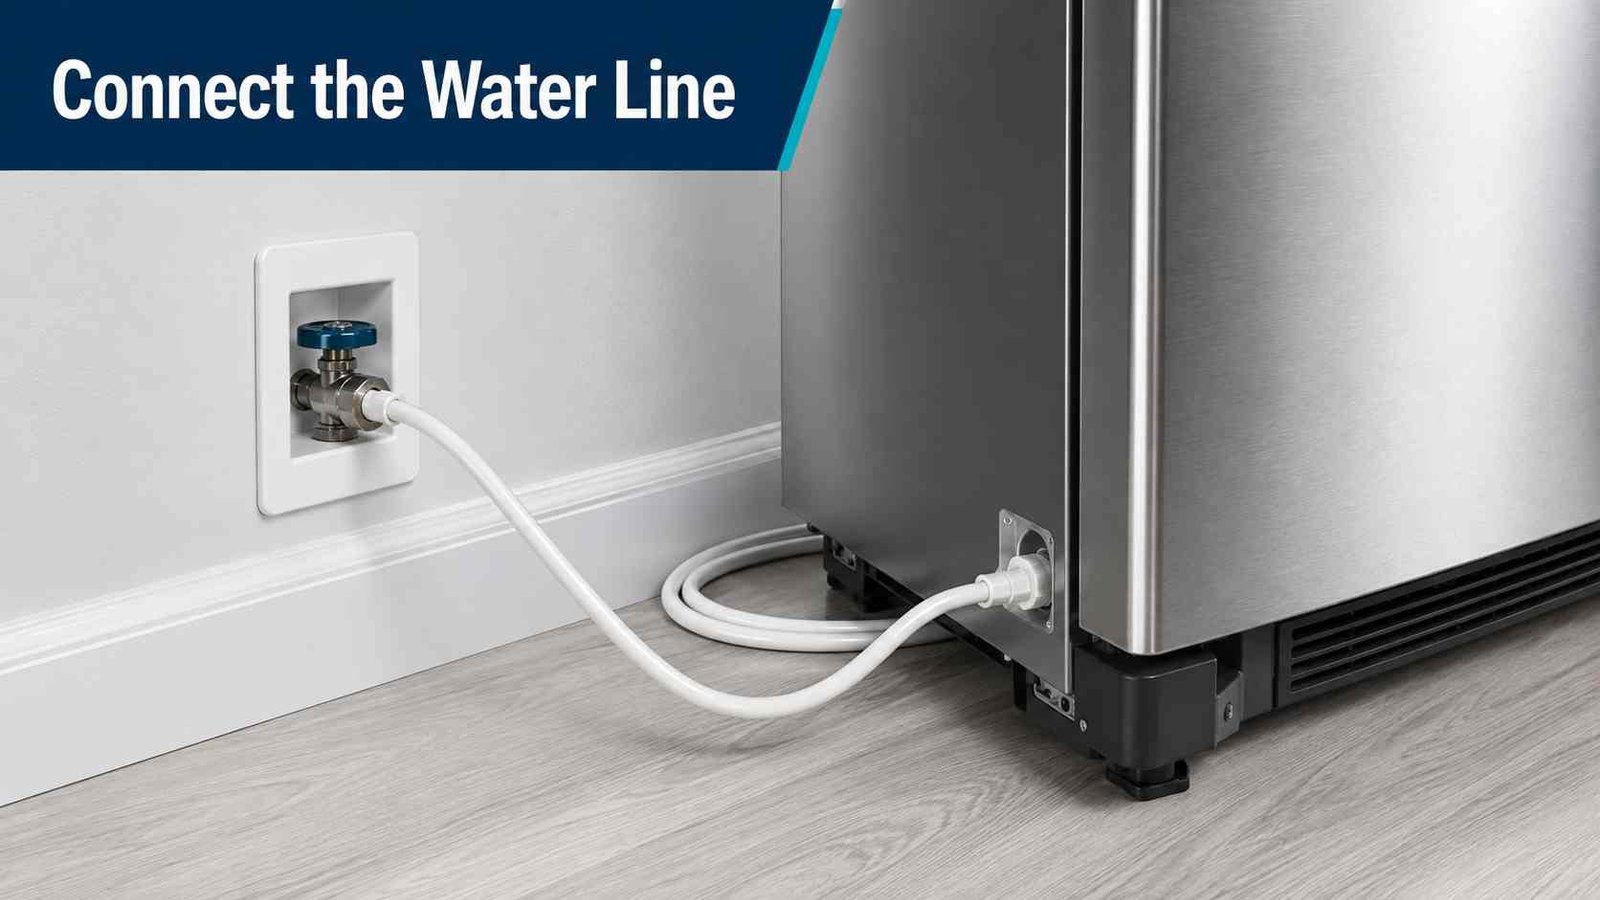
 Connecting a refrigerator water line is usually straightforward when your home already has a suitable cold-water shutoff valve. The basic job is to turn off the water, connect approved tubing between the shutoff valve and refrigerator, flush the line, open the supply slowly, and check carefully for leaks.
Many North American refrigerators use 1/4-inch (6.35 mm) outside-diameter tubing, but this is not universal. Connection type, tubing material, required pressure, filters, and flushing instructions can vary by model. Whirlpool and Maytag, for example, specify 1/4-inch soft copper or PEX for applicable models, while Samsung has additional model-specific connection requirements. Always check your refrigerator’s installation manual before buying fittings.
If your kitchen does not already have a suitable refrigerator water shutoff, installing or modifying household plumbing is a separate job. Local plumbing requirements apply, and professional installation may be the safer option.
| Item | General guidance |
|---|---|
| Water source | Cold potable water |
| Common tubing size | 1/4-inch / 6.35 mm OD on many North American models |
| Common tubing | Soft copper or PEX on many models |
| Shutoff valve | Required for a typical plumbed installation |
| Flush new line | Yes |
| Check for leaks | Before moving the refrigerator fully into position |
| Water pressure | Model-specific |
| DIY difficulty | Moderate if a proper shutoff already exists |
| Call a plumber | If household plumbing must be added or modified |
Whirlpool and Maytag state that applicable refrigerators should be connected to a cold-water supply and commonly use 1/4-inch outside-diameter soft copper or PEX tubing between the shutoff and refrigerator.
Important: This guide covers connecting a refrigerator to an existing, suitable water supply. It does not instruct you to cut, drill, pierce, or modify household plumbing.
Before You Start: Does Your Refrigerator Need a Water Line?
First confirm that the refrigerator is designed for a permanent water connection.
A refrigerator normally needs a household water supply if it has features such as:
- an automatic ice maker
- an external or internal water dispenser
- a plumbed automatic-fill pitcher
- other water-fed features listed in its manual
However, not every refrigerator with a water dispenser is plumbed. Some models use a refillable internal tank instead.
Also check the installation manual for your exact model number. Water fittings can differ even between refrigerators from the same manufacturer. Samsung, for example, notes that certain RS27T and RS22T models use two water lines that must not be cross-connected.
What You Need to Hook Up a Refrigerator Water Line
For a typical installation where a shutoff valve is already available, you may need:
- refrigerator-compatible water tubing
- the correct compression nut, ferrule, coupler, or model-specific fitting
- an adjustable wrench or manufacturer-specified hand tool
- a bucket or large container for flushing
- towels for checking and containing small amounts of water
- your refrigerator installation manual
Do not purchase fittings solely by looking at the refrigerator brand. Check the installation documentation first.
Whirlpool sells refrigerator water-line kits with 1/4-inch fittings for selected models, while Maytag describes 1/4-inch copper or PEX tubing in its installation guidance. Compatibility still needs to be confirmed for the individual refrigerator.
What Size Water Line Does a Refrigerator Use?
For many refrigerators sold in the United States and Canada, 1/4-inch (6.35 mm) outside-diameter tubing is common between the household shutoff and refrigerator.
Whirlpool and Maytag both specify this size in current support information for applicable refrigerators. Samsung US also recommends a 1/4-inch copper installation kit in its general refrigerator water-line guide.
That does not mean every refrigerator worldwide has the same fitting.
Some refrigerators may include:
- built-in plastic tubing
- quick-connect couplers
- external filter connections
- model-specific adapters
- more than one refrigerator-side water tube
Use the size and fitting specified in your model’s installation manual.
Copper, PEX, Plastic, or Braided Water Line?
There is no single tubing material that can be recommended for every refrigerator.
Whirlpool and Maytag support information lists soft copper or PEX for applicable 1/4-inch connections. Samsung US recommends a copper kit in its general guide and gives separate requirements when plastic tubing is used.
The important points are that the tubing:
- is approved for potable water and your refrigerator,
- has the correct outside diameter,
- uses compatible fittings,
- has enough length for the refrigerator to move for servicing,
- is routed without sharp bends, crushing, or kinks.
Do not assume an old refrigerator line is automatically suitable for a new model.
How to Hook Up a Water Line to a Refrigerator
1. Check the refrigerator manual
Before disconnecting anything, locate the model-specific installation instructions.
Confirm:
- tubing size
- fitting type
- required water pressure
- filter arrangement
- refrigerator-side connection location
- flushing procedure
Model-specific instructions take priority over a generic installation guide.
2. Turn off the water supply
Close the shutoff supplying the refrigerator before opening or loosening the connection.
Depending on the home, the refrigerator shutoff may be:
- directly behind the refrigerator
- inside a nearby cabinet
- underneath the kitchen sink
- in another accessible plumbing location
Maytag advises turning off the refrigerator water supply before working with the line.
If you cannot identify or safely operate the correct valve, stop and use a plumber rather than experimenting with household plumbing.
3. Disconnect electrical power while making the connection
Unplug the refrigerator or disconnect power as directed by the manufacturer while working behind the appliance.
Whirlpool’s installation guidance instructs users to disconnect electrical power before making applicable water-line connections.
Do not work on internal electrical components.
4. Position the refrigerator so you can reach the inlet
Pull the refrigerator far enough from the wall to work comfortably at the rear connection.
Avoid putting excessive force on:
- the power cord
- existing tubing
- drain lines
- refrigerator doors
- flooring
Leave enough supply tubing so the refrigerator can later be pulled forward without putting tension on the fitting.
5. Connect the tubing to the existing shutoff valve
Connect the supply tube using the fitting specified for your valve and tubing.
With a typical compression-style connection, components may include a compression nut and ferrule, but the arrangement differs with tubing type. Samsung US, for example, specifies a ferrule for its illustrated copper connection but a molded end or bulb for the applicable plastic tubing arrangement.
The connection should be secure, but do not overtighten it.
Overtightening can damage fittings and contribute to leakage. Samsung specifically warns against overtightening its refrigerator water-line compression connection.
6. Flush the supply line
Before making the final refrigerator connection, place the free end of the tubing into a bucket or sink where the model’s instructions allow this.
Open the water supply and allow water to flow through the new tubing until it runs clear. Then shut the supply off again before completing the refrigerator connection.
Whirlpool specifically includes flushing the tubing before connecting it to the refrigerator as part of its installation process.
Flushing helps clear installation debris from the new line before it reaches the refrigerator’s water system.
7. Connect the water line to the refrigerator
Locate the refrigerator’s water inlet or factory tubing connection.
Install the correct nut, ferrule, coupler, or other fitting exactly as shown in the model instructions.
Do not force a fitting that does not thread or seat easily. A fitting that appears nearly correct can still have the wrong thread, tubing diameter, or sealing design.
Some refrigerators use arrangements that differ substantially from the common single compression connection. Samsung specifically identifies model families with dual water lines, reinforcing the need to check model documentation.
8. Slowly turn the water supply back on
Once both connections are secure, slowly reopen the water supply.
Watch the connection while pressure enters the tubing.
If water immediately appears around a fitting, shut off the supply and correct the connection before continuing.
9. Check every connection for leaks
Inspect:
- the household shutoff
- the tubing connection at the shutoff
- any accessible couplers
- an external filter, if present
- the refrigerator-side fitting
- the tubing itself
Run a dry finger or paper towel around the fitting. A very slow leak may be easier to detect this way than by looking at it from several feet away.
Samsung instructs users to reopen the water and inspect connection areas for leaks after installation.
Do not ignore a small recurring drop. A connection that remains wet needs attention before the refrigerator is pushed back.
10. Route the tubing without kinking it
Arrange the extra tubing in a gentle curve behind the refrigerator.
Avoid:
- tight 90-degree bends
- loops trapped underneath a wheel
- tubing pinched between the refrigerator and wall
- sharp contact with cabinet edges
- tension pulling directly on the inlet fitting
A kink can restrict water going to the dispenser or ice maker. Whirlpool and Maytag both identify water-line restrictions or kinking as possible causes of poor refrigerator water or ice performance.
11. Restore power and position the refrigerator
Reconnect power after the plumbing connection is secure and dry.
Move the refrigerator slowly into position while watching the tubing if possible. Stop if you feel unusual resistance.
Once positioned, perform another leak check.
What If There Is No Refrigerator Shutoff Valve?
If there is no suitable water connection near the refrigerator, the job is no longer simply a refrigerator hookup. A branch connection and shutoff may need to be added to the home’s cold-water plumbing.
This is where generic online tutorials can become problematic because permitted valve types and installation methods vary.
For example, Samsung US illustrates one type of water-supply installation in its general instructions, while GE specifically says self-tapping or self-piercing valves are not recommended because their restricted opening can reduce water flow.
For a general homeowner guide, the safer approach is:
Have a suitable accessible cold-water shutoff installed according to local plumbing requirements rather than assuming one valve method is correct everywhere.
Professional installation is especially appropriate when plumbing must be cut, drilled, rerouted, or installed through walls or floors.
How to Flush the Refrigerator After Hookup
Flushing the supply tube and purging the refrigerator’s internal system are related but separate steps.
Once the refrigerator is connected and operating, trapped air may remain inside the new plumbing and refrigerator water system. Frigidaire notes that trapped air after installation can cause uneven dispenser flow and several empty ice-maker cycles.
Use your model’s specified flushing procedure.
Do not rely on one universal volume because manufacturers differ. For example:
| Manufacturer guidance example | Flushing/purging guidance |
|---|---|
| Samsung US | Dispense one gallon on applicable dispenser models |
| Samsung Australia | About 10 litres or 6–7 minutes on the covered models |
| Frigidaire | Newly installed units: discard at least one gallon in its prime-and-purge guidance |
These are manufacturer-specific examples, not interchangeable rules for every refrigerator.
Follow the amount specified for your refrigerator.
Refrigerator Has No Water After Hookup
If the connection is dry but no water reaches the dispenser or ice maker, start with the installation rather than assuming a refrigerator part has failed.
Check that the shutoff valve is actually open
A partially or fully closed supply valve can prevent proper flow.
Look for a kink or crushed tube
Pull the refrigerator forward carefully and inspect the supply line.
A restricted line can reduce dispenser flow and ice production.
Purge trapped air
A newly installed system can contain considerable air.
Frigidaire notes that initial water may take roughly one to two minutes to appear during its priming procedure, depending on the system.
Check the water filter
If the refrigerator uses a filter, confirm that it is:
- the correct filter
- fully inserted
- locked into position as required
Samsung identifies incorrect filter installation as one possible reason for dispenser problems on applicable refrigerators.
Check the model-specific water connections
If doors or tubing were disconnected during installation, verify that all refrigerator-side couplers were reconnected correctly.
This is particularly important on models with multiple water tubes.
Consider water pressure
If water flows but is unusually slow, compare the household supply with the pressure requirement in the model manual.
Do not use one generic pressure specification for all refrigerators.
LG lists 20–120 psi for the refrigerator connection covered by its current US guidance, while Samsung states that its ice maker requires at least 30 psi in its general US installation instructions.
Those differences are why your exact manual matters.
Common Refrigerator Water-Line Mistakes
Connecting to hot water
A plumbed refrigerator should normally connect to the specified cold potable-water supply. Whirlpool, LG, and Samsung all identify cold water in their applicable installation guidance.
Buying fittings before checking the manual
A 1/4-inch supply is common, but the refrigerator-side connection can vary.
Overtightening the fitting
More force does not necessarily make a better seal. It can damage a compression connection.
Leaving the line too short
The refrigerator needs enough tubing to move out for cleaning or service without pulling hard on the connection.
Pinching the tubing behind the refrigerator
A kinked line can reduce flow to the dispenser and ice maker.
Skipping the flush
New tubing and the refrigerator’s internal water system should be flushed or purged according to the manufacturer’s instructions before normal drinking-water or ice use.
Ignoring a slow leak
Any recurring moisture around a new fitting should be corrected before the refrigerator is left in service.
When Should You Call a Plumber or Technician?
Stop the DIY hookup and consider a qualified plumber if:
- there is no existing refrigerator shutoff
- household piping must be modified
- the shutoff valve is damaged or leaking
- the required fitting does not match your existing plumbing
- tubing must be routed through walls, ceilings, cabinets, or floors
- local rules require qualified plumbing work
- water pressure needs diagnosis
- a plumbing connection continues to leak
For Australian Samsung models covered by its current support guidance, Samsung specifically states that the refrigerator water line must be connected by a qualified technician.
Contact appliance service rather than continuing plumbing work if water reaches the refrigerator correctly but an internal refrigerator leak, inlet-valve fault, dispenser fault, or other appliance problem remains.
FAQs
Can I hook up a refrigerator water line myself?
If an appropriate cold-water shutoff already exists and your refrigerator manual permits homeowner installation, connecting the approved supply tubing can be a manageable job. If household plumbing must be installed or changed, professional plumbing help is safer and may be required locally.
Does a refrigerator water line connect to hot or cold water?
Use the cold potable-water supply specified by the refrigerator manufacturer. Whirlpool, LG, Samsung, and Maytag guidance for applicable plumbed refrigerators specifies cold water.
What size water line do I need for a refrigerator?
Many North American refrigerators use 1/4-inch (6.35 mm) outside-diameter tubing between the shutoff and refrigerator. Confirm the exact size in your installation manual because connections vary.
Can I use PEX for a refrigerator water line?
PEX is specifically permitted in current Whirlpool and Maytag guidance for applicable 1/4-inch refrigerator connections. That does not automatically make it correct for every model, so verify your refrigerator documentation first.
How tight should the refrigerator water-line fitting be?
It should be secure enough to seal without being overtightened. Follow the fitting and refrigerator instructions because connection designs differ. Samsung specifically warns that overtightening its illustrated compression connection can cause leakage.
Why is there no water after I connected the refrigerator?
Common installation-related possibilities include a closed supply valve, kinked tubing, trapped air, an improperly installed filter, an incorrectly connected refrigerator tube, or inadequate supply pressure. Check these before assuming an internal refrigerator component has failed.
How much water should I flush after installing the refrigerator?
There is no universal amount. Samsung US recommends one gallon for the applicable models covered by its guide, Samsung Australia specifies about 10 litres or 6–7 minutes for its covered installation, and Frigidaire recommends at least one gallon for newly installed units in its prime-and-purge guide. Follow your exact model instructions.
Do I need a plumber to install a refrigerator water line?
Not necessarily when a suitable shutoff already exists and the installation manual permits a simple connection. A plumber is appropriate when a new household connection is required, plumbing must be modified, leaks persist, or local requirements call for qualified installation.

Daniel Brooks is a US-based appliance troubleshooting researcher with 12 years of experience studying washer, dryer, refrigerator, and dishwasher faults. He reviews manufacturer manuals and converts technical error codes into safe, practical guidance for homeowners.